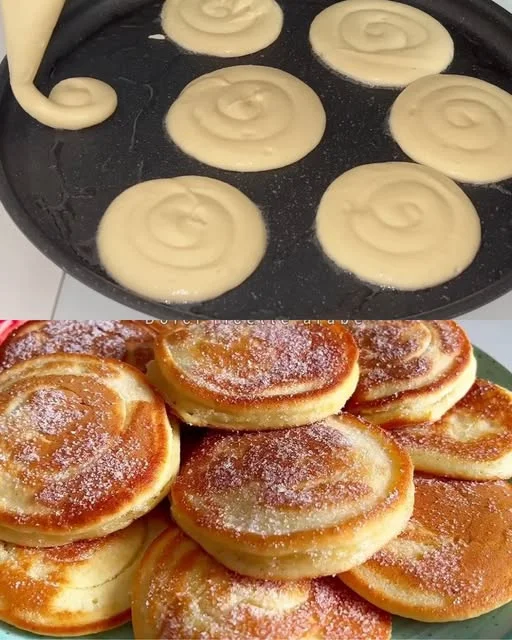
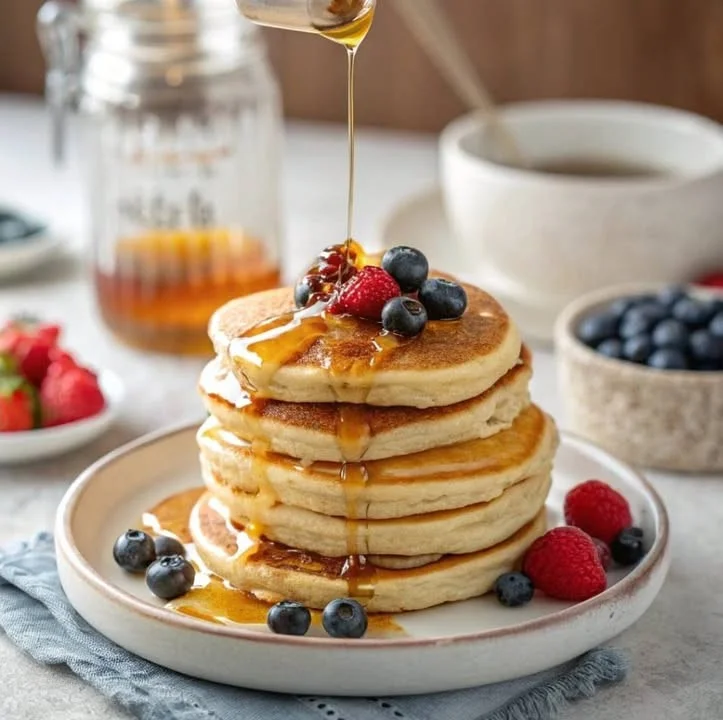
BANANA PANCAKES

Introduction:

  • Emotionally Resonant Opening:
    • Imagine waking up to the smell of freshly cooked pancakes, golden and fluffy, with the sweet aroma of ripe bananas filling the air. For many, banana pancakes are not just a meal but a comforting experience—a reminder of weekend mornings spent with family or a cozy moment alone. Whether you’re looking for a healthier breakfast or simply want a new twist on traditional pancakes, banana pancakes offer the perfect balance of flavor, texture, and nutrition.

Why Banana Pancakes Are the Perfect Breakfast

  • Nutritional Benefits:
    • Bananas are rich in potassium, fiber, and antioxidants. Combined with whole grains, eggs, and other ingredients, banana pancakes are a great way to start your day with energy and nutrients.
    • Benefits of bananas: Heart health, digestive health, and natural sweetness that reduce the need for extra sugar.
    • Highlight the use of whole-grain flour or almond flour for an added boost of nutrients.
  • Customization Options:
    • Discuss how you can customize your banana pancakes with toppings like berries, honey, or nuts for added health benefits.

Ingredients You’ll Need for the Perfect Banana Pancakes

  • Table: Ingredients for Banana Pancakes
IngredientQuantityPurpose
Ripe bananas2Adds sweetness and moisture
All-purpose flour1 cupThe base for the pancakes
Baking powder1 tspHelps the pancakes rise
Salt1/4 tspBalances sweetness
Eggs2Binds ingredients and adds richness
Milk (or dairy-free milk)1/2 cupAdds moisture
Vanilla extract1 tspAdds flavor
Butter or oil2 tbspFor cooking the pancakes
  • Brief Explanation:
    • A brief breakdown of why each ingredient is essential for creating the best banana pancakes.

Step-by-Step Guide to Making Banana Pancakes

  • Preparing the Banana Pancake Batter
    • Step 1: Mash the bananas until smooth.
    • Step 2: In a separate bowl, combine dry ingredients: flour, baking powder, and salt.
    • Step 3: In another bowl, whisk together the eggs, milk, and vanilla extract.
    • Step 4: Combine the wet and dry ingredients, folding in the mashed bananas.
  • Cooking Your Banana Pancakes
    • Step 1: Heat a non-stick pan over medium heat, adding a little butter or oil.
    • Step 2: Pour a scoop of batter onto the pan and cook until bubbles appear on the surface.
    • Step 3: Flip the pancake and cook until golden brown on both sides.
  • Tip: Make sure your bananas are ripe for the best flavor and natural sweetness.

Delicious Toppings and Variations for Banana Pancakes

  • Classic Toppings:
    • Maple syrup
    • Sliced bananas
    • Whipped cream
  • Healthy Variations:
    • Add fresh berries (blueberries, strawberries) for a burst of antioxidants.
    • Nut butter (peanut butter, almond butter) for extra protein.
    • Greek yogurt for creaminess and added protein.
  • Fun Flavor Twists:
    • Sprinkle cinnamon or nutmeg into the batter for added warmth.
    • Drizzle chocolate syrup or melted dark chocolate for a treat.

Frequently Asked Questions (FAQs) About Banana Pancakes

  • Can I make banana pancakes ahead of time?
    • Yes! You can prepare the batter ahead of time and store it in the fridge for up to 24 hours. Just give it a good stir before cooking.
  • Can I make banana pancakes without eggs?
    • Absolutely! You can substitute eggs with a flax egg (1 tbsp ground flaxseed mixed with 3 tbsp water) or use a chia egg for a vegan option.
  • How do I make banana pancakes fluffier?
    • Ensure you’re using ripe bananas for moisture, and don’t overmix the batter. The key to fluffiness is gentle stirring, and don’t forget to let the batter rest for a few minutes before cooking.
  • Can I freeze banana pancakes?
    • Yes, banana pancakes freeze beautifully. Simply place them in a single layer on a baking sheet to freeze, then store them in an airtight container or ziplock bag for up to 3 months.

Conclusion: Enjoy Your Fluffy, Delicious Banana Pancakes Today!

  • Wrap up by encouraging readers to enjoy banana pancakes as a quick, healthy breakfast that can be customized to their taste.
  • Offer a call-to-action: “Ready to make your own batch of banana pancakes? Grab your ingredients and treat yourself to a delicious start to the day!”

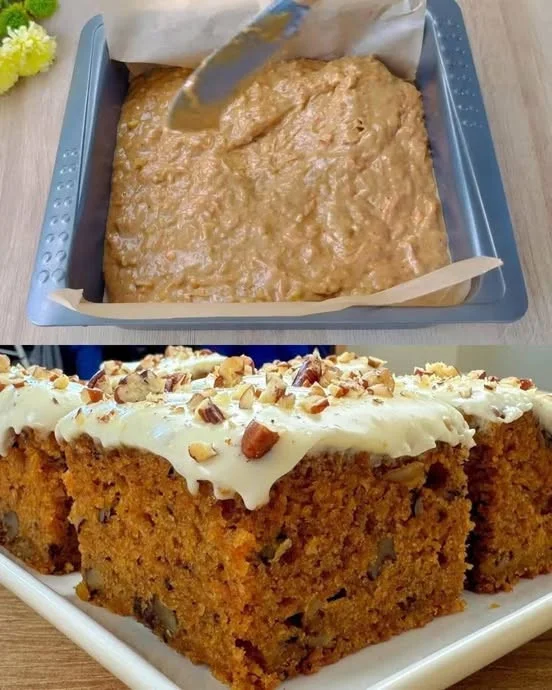
CARROT CAKE WITH CREAM CHEESE FROSTING

Introduction: A Slice of Nostalgia and Comfort

There’s something about the first bite of a carrot cake topped with creamy, tangy cream cheese frosting that takes you back to simpler times—maybe it’s a family gathering, a birthday celebration, or just a sweet moment of indulgence. Whether you’re baking it for a special occasion or treating yourself on a weekend afternoon, carrot cake with cream cheese frosting combines warm spices, a tender crumb, and a rich, velvety topping. But how do you get it just right? In this comprehensive guide, you’ll learn everything you need to know about making the perfect carrot cake with cream cheese frosting—from the best ingredients to the foolproof techniques that will leave everyone asking for seconds.


What Makes Carrot Cake with Cream Cheese Frosting So Irresistible?

Key Points

  • Introduction to the appeal of carrot cake with cream cheese frosting.
  • The balance between moist texture, spices, and sweetness.
  • Why this cake remains a favorite for so many: nostalgia, flavor, and versatility.

Why Carrot Cake with Cream Cheese Frosting is a Classic Dessert

Key Points

  • Nostalgia: Rooted in tradition, it’s often tied to family gatherings and celebrations.
  • Flavor Profile: A harmonious blend of spices, natural sweetness from carrots, and the tangy richness of cream cheese.
  • Texture: The moist, dense crumb of the cake contrasts beautifully with the smooth, creamy frosting.
  • Versatility: Perfect for different occasions, from casual gatherings to formal events.

Key Ingredients for a Delicious Carrot Cake with Cream Cheese Frosting

To make the perfect carrot cake with cream cheese frosting, it’s essential to choose high-quality ingredients. Below is a table that outlines the must-have ingredients for both the cake and frosting:

IngredientPurpose/Role
CarrotsAdds moisture and natural sweetness to the cake.
FlourForms the structure of the cake, providing the base.
SugarSweetens the cake, balancing the flavors.
EggsBind the ingredients together and add richness.
Baking Soda/ Baking PowderEnsures the cake rises and becomes light and fluffy.
Cinnamon & NutmegAdds warm, comforting spice to the cake.
Vanilla ExtractEnhances the overall flavor.
Cream CheeseThe base for the frosting, providing creaminess and tang.
ButterAdds richness and stability to the frosting.
Powdered SugarSweetens the frosting and provides smooth texture.
Lemon Juice or ZestAdds a fresh tang to balance the sweetness of the frosting.

Tips for Choosing the Best Carrots

Key Points

  • Freshness is Key: Use fresh, firm carrots with bright orange color for the best flavor and moisture.
  • Shredding the Carrots: Grate them finely to ensure the cake has a smooth texture without large chunks.

Substitutions and Variations

Key Points

  • For Gluten-Free Carrot Cake: Use a gluten-free all-purpose flour blend.
  • Dairy-Free Option: Substitute the cream cheese and butter with dairy-free alternatives like coconut cream or plant-based butter.
  • Add-ins: Consider adding nuts (walnuts or pecans) or dried fruits (raisins, cranberries) for extra texture and flavor.

How to Make the Perfect Carrot Cake with Cream Cheese Frosting

Follow these step-by-step instructions for a foolproof carrot cake recipe.

Step-by-Step Carrot Cake Instructions

  1. Preheat the Oven and Prepare Pans:
    Preheat your oven to 350°F (175°C). Grease and line two 9-inch round cake pans with parchment paper for easy removal.
  2. Mix the Dry Ingredients:
    In a medium bowl, whisk together flour, baking soda, salt, cinnamon, and nutmeg. Set aside.
  3. Prepare the Wet Ingredients:
    In a separate large bowl, beat the eggs and sugar until light and fluffy. Add the vegetable oil (or melted butter) and vanilla extract. Mix until smooth.
  4. Combine Wet and Dry Ingredients:
    Gradually fold the dry ingredients into the wet mixture until just combined—be careful not to overmix.
  5. Add the Carrots:
    Gently fold in the shredded carrots (and any optional add-ins like walnuts or raisins).
  6. Bake the Cake:
    Divide the batter evenly between the two cake pans. Bake for 30-35 minutes or until a toothpick inserted into the center comes out clean.
  7. Cool and Prepare the Frosting:
    Allow the cakes to cool completely on a wire rack before frosting.

Step-by-Step Cream Cheese Frosting Instructions

  1. Cream the Butter and Cream Cheese:
    Beat the softened butter and cream cheese together until smooth and creamy.
  2. Add Powdered Sugar:
    Gradually add the powdered sugar, a little at a time, and continue beating until smooth and fluffy.
  3. Flavor the Frosting:
    Stir in the vanilla extract and a teaspoon of lemon juice or zest to balance the sweetness.
  4. Frost the Cake:
    Once the cakes are completely cool, frost generously with the cream cheese mixture. Optionally, top with chopped nuts or grated carrot for decoration.

Storing and Serving Your Carrot Cake with Cream Cheese Frosting

Key Points

  • Storage Tips:
    • Store the cake in an airtight container in the refrigerator for up to 5 days.
    • For longer storage, wrap the cake tightly in plastic wrap and freeze for up to 3 months.
  • Serving Suggestions:
    Serve chilled or at room temperature for the best flavor. It’s perfect with a hot cup of tea or coffee, making it an excellent choice for any gathering.

Common FAQs About Carrot Cake with Cream Cheese Frosting

Can I make carrot cake ahead of time?

Yes! Carrot cake actually tastes better after a day or two as the flavors meld together. You can bake and frost it in advance and store it in the fridge.

Why does my cream cheese frosting taste runny?

If your frosting is too runny, it might be because the cream cheese or butter was too warm when mixed. Make sure both are softened, but not melted, before combining. If it’s still too thin, add a little more powdered sugar to thicken it up.

Can I use different frosting for carrot cake?

While cream cheese frosting is the traditional and most beloved choice, you can also try a buttercream frosting or even a spiced mascarpone frosting for a unique twist.

Can I make carrot cake without eggs?

Yes, you can substitute eggs with flax eggs or chia eggs (1 tablespoon ground flax or chia mixed with 3 tablespoons water per egg) to make the cake egg-free.


Conclusion: Enjoy Your Homemade Carrot Cake with Cream Cheese Frosting

Now that you have all the knowledge to bake a flawless carrot cake with cream cheese frosting, it’s time to roll up your sleeves and get started. Whether you’re making it for a special occasion or simply as a treat for yourself, this cake is guaranteed to bring comfort, joy, and a bit of nostalgia to your table. So go ahead—treat yourself and your loved ones to a slice of homemade happiness!

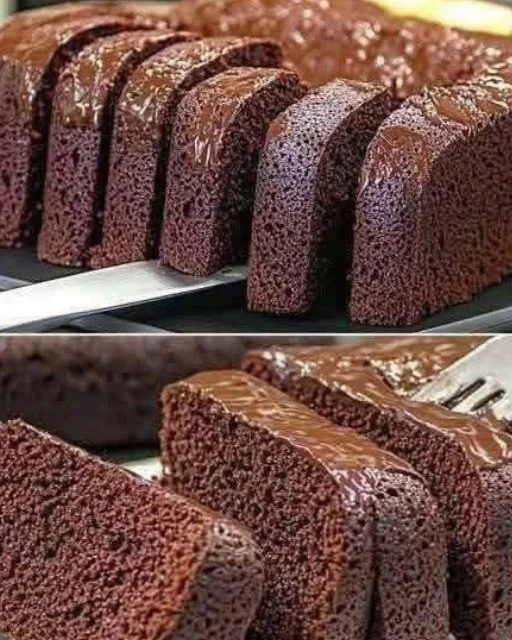
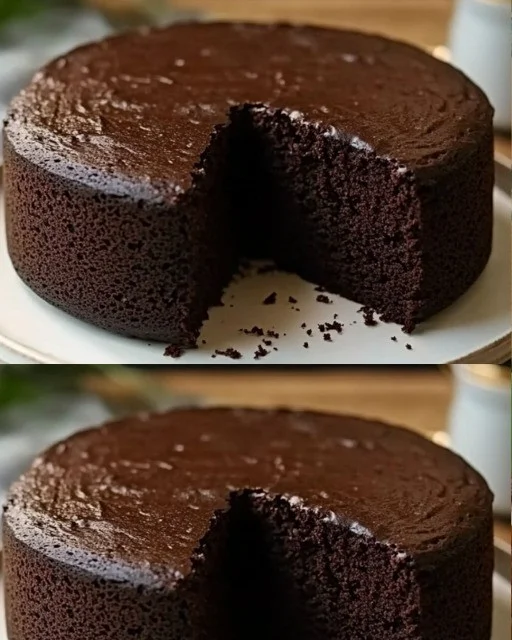
SMALL CHOCOLATE CAKE RECIPE

Why You’ll Love This Small Chocolate Cake Recipe

  • Perfect for Any Occasion: Highlight the convenience of a small cake for birthdays, date nights, or self-indulgent treats.
  • Quick and Easy: Mention that the recipe is simple, beginner-friendly, and can be made with basic pantry ingredients.
  • Rich Chocolate Flavor: Describe the decadent taste and how it rivals the flavor of a full-sized cake.

Ingredients for the Small Chocolate Cake

  • Essential Ingredients: List the main components and why they’re important.
    • All-Purpose Flour: “The base of the cake, creating a soft and fluffy texture.”
    • Cocoa Powder: “For that deep, rich chocolate flavor.”
    • Sugar: “To add the perfect amount of sweetness.”
    • Baking Soda & Baking Powder: “Both work together to give the cake a light, airy rise.”
    • Eggs: “Provide structure and moisture.”
    • Milk: “Adds richness and moisture.”
    • Oil: “Keeps the cake tender and moist.”
    • Vanilla Extract: “Enhances the chocolate flavor.”
    • Hot Coffee (or hot water): “Intensifies the chocolate taste and ensures a moist cake.”
  • Ingredient Table for Easy Reference
  • Ingredient: All-Purpose Flour 1/2 cup, Cocoa Powder1/4 cup, Granulated Sugar 1/2 cup, Baking Soda1/4 teaspoon, Baking Powder 1/4 teaspoon, Egg1Milk1/4 cup, Vegetable Oil2 tablespoons, Vanilla Extract1 teaspoon, Hot Coffee/Water1/4 cup

How to Make a Small Chocolate Cake

  • Step-by-Step Instructions
    1. Preheat Your Oven: Set it to 350°F (175°C) and prepare a 6-inch cake pan with non-stick spray and parchment paper.
    2. Mix the Dry Ingredients: In a bowl, whisk together the flour, cocoa powder, sugar, baking soda, and baking powder.
    3. Combine the Wet Ingredients: In a separate bowl, beat the egg, then add the milk, oil, and vanilla extract.
    4. Combine Wet and Dry Mixtures: Slowly add the dry ingredients into the wet mixture, stirring gently to avoid overmixing.
    5. Add Hot Coffee: Gradually pour in the hot coffee (or water), mixing until smooth. The batter will be thin, but this ensures a moist cake.
    6. Bake: Pour the batter into the prepared pan and bake for 20-25 minutes, or until a toothpick comes out clean.
    7. Cool Completely: Let the cake cool in the pan for 10 minutes before transferring to a wire rack.
  • Optional Toppings and Frosting Ideas
    • Classic Chocolate Buttercream: “Rich and creamy, perfect for spreading or piping.”
    • Dusting of Powdered Sugar: “A simple but elegant touch.”
    • Ganache Drizzle: “Decadent and glossy for a luxurious finish.”

Tips for Baking the Perfect Small Chocolate Cake

  • Use High-Quality Cocoa Powder: “This makes a noticeable difference in the cake’s flavor.”
  • Don’t Overmix: “Overmixing can make the cake dense. Stir until just combined.”
  • Check for Doneness: “Baking times can vary, so use a toothpick to test. It should come out mostly clean, with a few moist crumbs.”

Frequently Asked Questions About Small Chocolate Cake

  • Can I Make This Cake Without Eggs?
    • Answer: Yes, you can substitute the egg with 1/4 cup of unsweetened applesauce or a flaxseed egg.
  • How Should I Store Leftovers?
    • Answer: Cover tightly and keep at room temperature for up to 2 days, or refrigerate for up to a week.
  • Can I Double the Recipe for a Larger Cake?
    • Answer: Absolutely! Double the ingredients and use an 8-inch pan, adjusting the baking time accordingly.

Conclusion

  • Final Thoughts: “This small chocolate cake recipe is perfect for those moments when you need a quick chocolate fix or want to celebrate something special without the hassle of a full cake.”
  • Call to Action: “Give this recipe a try and share your experience in the comments below. We’d love to see how you make it your own!”

BREAKFAST FRIED RICE

Introduction: A Heartwarming Morning Ritual

Imagine waking up to the comforting aroma of savory rice mingling with fresh vegetables and perfectly cooked eggs. Breakfast Fried Rice isn’t just a meal; it’s a warm embrace on a busy morning. Whether it reminds you of cozy family breakfasts or serves as a quick, nutritious option for your hectic schedule, this dish can elevate your mornings. Let’s dive into the world of Breakfast Fried Rice and discover how you can make it a staple in your kitchen.

What is Breakfast Fried Rice?

  • Definition and Origin
    • Brief history of fried rice in Asian cuisine
    • Evolution of breakfast variations across cultures
  • Why Breakfast Fried Rice?
    • Nutritional benefits: Balanced carbs, proteins, and vegetables
    • Versatility for different diets: Vegetarian, gluten-free, etc.

Essential Ingredients for Breakfast Fried Rice

Basic Components

  • Rice
    • Importance of using day-old rice for texture
    • Alternatives: Brown rice, quinoa, or cauliflower rice
  • Proteins
    • Options: Eggs, tofu, chicken, shrimp
    • Suggestions for vegetarian/vegan proteins
  • Vegetables
    • Recommended veggies: peas, carrots, bell peppers, scallions
    • Seasonal vegetable swaps for freshness

Flavor Enhancers

  • Sauces and Seasonings
    • Soy sauce, sesame oil, and oyster sauce
    • Optional: Sriracha or chili paste for heat
  • Herbs and Garnishes
    • Fresh cilantro, green onions, and sesame seeds
    • How garnishing enhances visual appeal and taste
IngredientQuantity
Day-old rice2 cups
Eggs2
Peas1 cup
Carrots1 cup diced
Soy sauce3 tbsp

How to Make Breakfast Fried Rice

Step-by-Step Instructions

  1. Prep Your Ingredients
    • Chop vegetables, whisk eggs, and measure sauces.
  2. Cook the Proteins
    • Scramble eggs first, set aside.
  3. Stir-Fry the Vegetables
    • Sauté veggies until tender.
  4. Combine Ingredients
    • Add rice, proteins, and sauces, stir-frying until heated through.
  5. Serve and Enjoy
    • Plate your dish and add garnishes.

Tips for Perfect Fried Rice

  • High Heat Cooking
    • Why using a hot pan is crucial for texture
  • Avoiding Clumps
    • How to break up rice for even frying
  • Timing for Best Flavor
    • When to add sauces and seasonings for maximum taste

Variations of Breakfast Fried Rice

Global Influences

  • Thai Breakfast Fried Rice
    • Incorporating Thai basil and chili
  • Mexican-Inspired Breakfast Rice
    • Adding black beans and avocado
  • Mediterranean Twist
    • Featuring feta cheese and olives

Customization Tips

  • Make it Spicy
    • Adding jalapeños or hot sauce
  • Add Crunch
    • Topping with crispy fried onions or nuts

Common Questions About Breakfast Fried Rice

FAQ Section

  • What type of rice is best for breakfast fried rice?
    • Day-old rice is preferred for the right texture.
  • Can I make breakfast fried rice ahead of time?
    • Yes, it stores well in the fridge for quick reheating.
  • Is breakfast fried rice healthy?
    • When made with fresh ingredients, it can be a balanced meal.

Conclusion: Make Breakfast Fried Rice Your New Morning Favorite

Breakfast Fried Rice is not only easy to make, but it’s also a canvas for your creativity. By combining your favorite ingredients and flavors, you can craft a dish that’s perfect for your mornings. Try it out, and you might just find that this delicious and satisfying meal transforms your breakfast routine.

SMOOTHIE BOWL

What is a Smoothie Bowl?

A smoothie bowl is similar to a regular smoothie, but thicker in consistency and often topped with various ingredients like fruits, nuts, seeds, and granola. Unlike traditional smoothies, smoothie bowls are meant to be eaten with a spoon, giving you a more substantial and filling breakfast. They’re also customizable, making it easy to adapt them to your dietary preferences or nutritional needs.


The Health Benefits of Smoothie Bowls

Smoothie bowls are not only delicious but also packed with nutrients. Here’s why they’re a great addition to your diet:

  • High in Fiber: Smoothie bowls often include fruits, oats, and seeds, all of which provide ample dietary fiber. Fiber aids digestion and helps you stay full longer.
  • Rich in Antioxidants: Ingredients like berries, spinach, and chia seeds are loaded with antioxidants, which help fight inflammation and protect against cell damage.
  • Vitamins and Minerals: You can pack a smoothie bowl with leafy greens, nuts, and other superfoods, ensuring you get a wide range of essential vitamins and minerals in each serving.
  • Energy-Boosting: Smoothie bowls, especially those with added protein or healthy fats, provide sustained energy throughout your morning.

How to Make the Perfect Smoothie Bowl

Step-by-Step Guide to Crafting a Smoothie Bowl

  1. Choose Your Base: Start with a creamy base like frozen bananas, mangoes, or berries. These not only create the desired texture but also add natural sweetness.
  2. Pick Your Liquid: For the perfect consistency, use just enough liquid to blend your ingredients without making it too runny. Good options include almond milk, coconut water, or plain water.
  3. Add a Protein or Superfood Boost: Want to make your smoothie bowl more filling? Add in protein powder, nut butter, or superfoods like spirulina or chia seeds.
  4. Blend Until Smooth: Blend your base ingredients and liquid until smooth, but keep it thick. You want the mixture to hold your toppings without sinking.
  5. Top It Off: The fun part! Add toppings like sliced fruits, granola, seeds, coconut flakes, or even a drizzle of honey or almond butter for extra flavor and crunch.

Example Smoothie Bowl Ingredients Table:

IngredientAmountBenefits
Frozen Bananas1 cupAdds creaminess and natural sweetness
Mixed Berries1/2 cupRich in antioxidants and vitamins
Almond Milk1/2 cupDairy-free, light, and nutty flavor
Chia Seeds1 tbspHigh in fiber and omega-3 fatty acids
Granola1/4 cupAdds crunch and extra fiber
Fresh Berries1/4 cupBoosts flavor and provides more vitamins

Topping Ideas for Your Smoothie Bowl

Your toppings can take your smoothie bowl from good to great! Here are some popular and creative ideas:

  • Crunchy Toppings: Granola, crushed nuts, seeds (like chia or flax), and toasted coconut flakes.
  • Fruity Additions: Fresh berries, sliced bananas, kiwi, or pomegranate seeds.
  • Sweet Boosts: A drizzle of honey, maple syrup, or almond butter.
  • Creative Touches: Edible flowers, cacao nibs, or a sprinkle of matcha powder for a pop of color and extra health benefits.

Pro Tip: To create an Instagram-worthy bowl, arrange your toppings neatly in rows or fun patterns.


5 Delicious Smoothie Bowl Recipes You’ll Love

H3: 1. Classic Acai Smoothie Bowl

  • Base: Frozen acai puree, bananas, almond milk
  • Toppings: Granola, sliced strawberries, chia seeds

2. Tropical Mango Smoothie Bowl

  • Base: Frozen mango, pineapple, coconut milk
  • Toppings: Toasted coconut flakes, sliced kiwi, granola

3. Green Goddess Smoothie Bowl

  • Base: Spinach, avocado, frozen banana, coconut water
  • Toppings: Hemp seeds, fresh berries, pumpkin seeds

4. Berry Blast Smoothie Bowl

  • Base: Mixed frozen berries, Greek yogurt, almond milk
  • Toppings: Fresh raspberries, blueberries, granola, honey

5. Chocolate Peanut Butter Smoothie Bowl

  • Base: Frozen bananas, cocoa powder, peanut butter, almond milk
  • Toppings: Dark chocolate shavings, crushed peanuts, chia seeds

Smoothie Bowls for Special Diets

Smoothie bowls are incredibly versatile and can be tailored to fit any dietary preference:

  • Vegan: Use plant-based milk like almond, soy, or coconut milk. Replace yogurt with dairy-free alternatives.
  • Keto: Focus on low-carb ingredients like avocado, spinach, and protein powder. Skip high-carb fruits like bananas or mangoes.
  • Gluten-Free: Most smoothie bowls are naturally gluten-free, but double-check toppings like granola to ensure they are certified gluten-free.

FAQs About Smoothie Bowls

1. What makes smoothie bowls different from regular smoothies?

Smoothie bowls are thicker, eaten with a spoon, and usually topped with a variety of ingredients that add texture and flavor. The thicker consistency allows you to enjoy the toppings in every bite.

2. Are smoothie bowls healthy?

Yes! Smoothie bowls can be packed with fruits, vegetables, and other nutrient-dense ingredients. However, be mindful of portion sizes and added sugars in some toppings like honey or sweetened granola.

3. Can I make a smoothie bowl the night before?

Absolutely! Prepare the base and store it in the fridge. In the morning, add your toppings fresh for the best texture and flavor.

4. What’s the best way to get a thick consistency for my smoothie bowl?

Using frozen fruits, especially bananas or berries, helps create a thick texture. Limit the amount of liquid you use to keep the mixture from becoming too runny.


Conclusion: Start Your Day with a Smoothie Bowl

Smoothie bowls are more than just a food trend—they’re a nutritious, customizable, and delicious way to power up your mornings. Whether you’re looking for a quick and healthy breakfast or want to experiment with new ingredients, there’s no limit to the combinations you can create. Give one of these recipes a try and see how a smoothie bowl can transform your mornings!