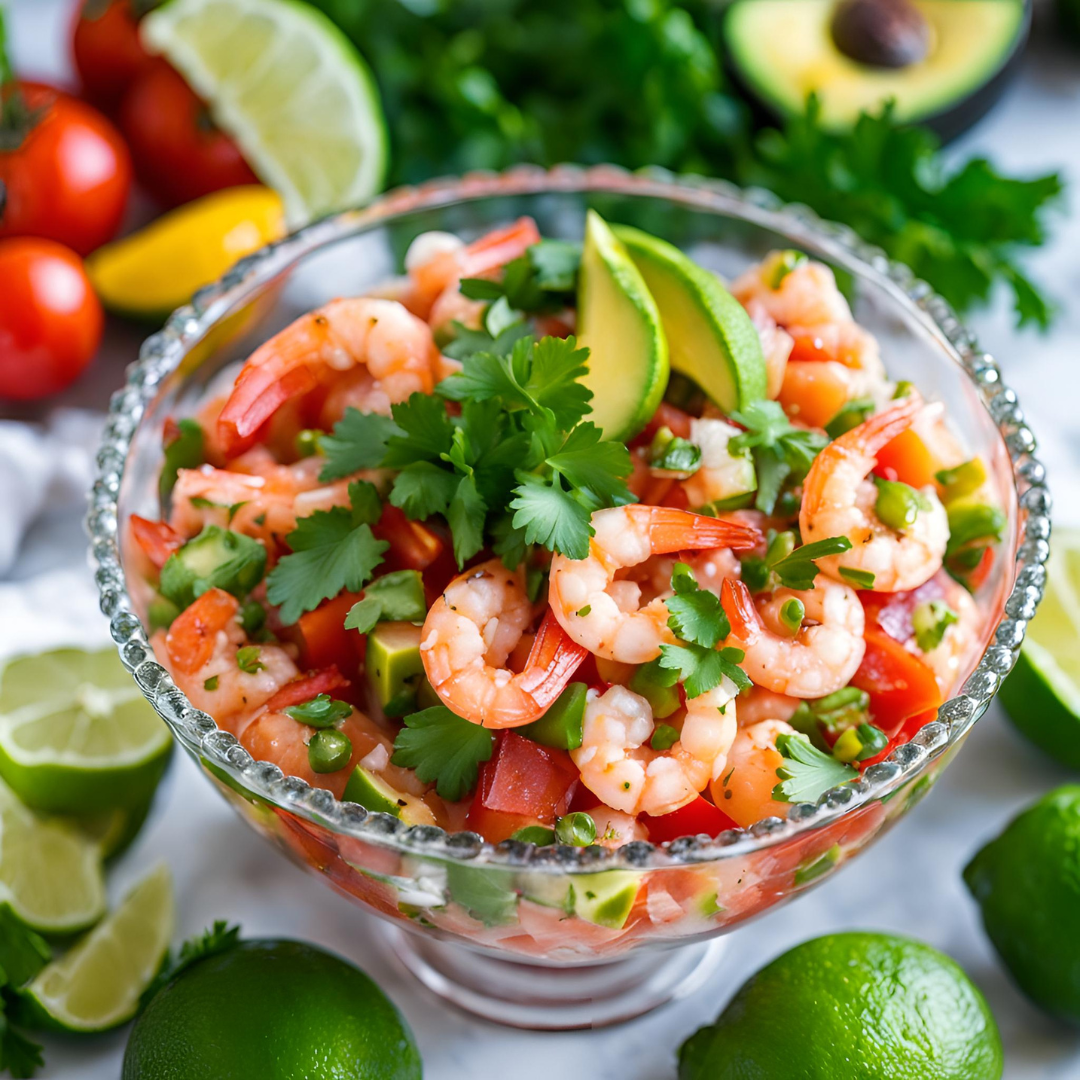
MEXICAN SHRIMP COCKTAIL

What Is Mexican Shrimp Cocktail?

  • Brief history and cultural significance in Mexican cuisine.
  • How it differs from traditional shrimp cocktails (e.g., use of tomato juice, cilantro, and bold spices).
  • Describe its versatility as a light meal, appetizer, or party dish.

Ingredients for Mexican Shrimp Cocktail

Essential Ingredients for Authentic Flavor
  • List key components with brief explanations:
    • Shrimp: Fresh or cooked, peeled and deveined.
    • Tomato Juice: Acts as the base for the tangy sauce.
    • Cilantro, Lime, and Jalapeño: Adds freshness and a spicy kick.
    • Avocado: For creamy, rich texture.
    • Vegetables (Tomatoes, Cucumber, Onion): Brings crunch and balance.
Table of Ingredients
IngredientQuantityNotes
Cooked shrimp1 lbPeeled and deveined
Tomato juice1 cupClamato or V8 for added flavor
Lime juice2 tbspFreshly squeezed
Diced tomatoes1 cupFresh and ripe
Cucumber, diced½ cupAdds crunch
Avocado, diced1 largeFor creaminess
Jalapeño, diced1 smallOptional, for spice
Cilantro, chopped¼ cupFresh and aromatic
Ketchup¼ cupBalances the tang
Hot sauce1 tspOptional, adjust to taste
Salt and pepperTo tasteFor seasoning

Step-by-Step Guide to Making Mexican Shrimp Cocktail

1. Prepare Your Shrimp
  • If using raw shrimp, boil for 2-3 minutes until pink and cooked through. Chill in ice water.
2. Create the Flavorful Base
  • Mix tomato juice, ketchup, lime juice, and hot sauce in a large bowl. Season with salt and pepper.
3. Add Fresh Ingredients
  • Combine shrimp, tomatoes, cucumber, onion, jalapeño, and cilantro into the bowl. Stir to coat.
4. Garnish and Serve
  • Gently fold in diced avocado. Chill the mixture for 30 minutes for the flavors to meld.
  • Serve in glasses or bowls with tortilla chips or crackers.

Tips for Perfecting Your Mexican Shrimp Cocktail

  • Use fresh, high-quality ingredients for the best flavor.
  • Adjust the spice level to your taste by adding more or less jalapeño and hot sauce.
  • Serve chilled for optimal taste and texture.

Variations to Try

  • Vegetarian Version: Substitute shrimp with cooked chickpeas or hearts of palm.
  • Seafood Mix: Add crabmeat, scallops, or octopus for a seafood medley.
  • Spicy Twist: Incorporate chipotle peppers in adobo for a smoky heat.

Why Mexican Shrimp Cocktail is a Must-Try Dish

  • Combines bold, fresh flavors in one bowl.
  • Easy to make with minimal cooking required.
  • Perfect for entertaining or enjoying as a healthy, low-calorie meal.

FAQ About Mexican Shrimp Cocktail

Can I Make Mexican Shrimp Cocktail Ahead of Time?

Yes! Prepare the sauce and chop the veggies ahead. Add the shrimp and avocado just before serving.

What Can I Serve with Mexican Shrimp Cocktail?

It pairs beautifully with tortilla chips, crackers, or even a side of crusty bread.

Can I Use Frozen Shrimp?

Absolutely! Just thaw, rinse, and use as directed.

How Long Does Mexican Shrimp Cocktail Last in the Fridge?

It stays fresh for up to 2 days in an airtight container. Avoid freezing as the texture may change.


Conclusion: A Dish to Delight Your Taste Buds

Mexican Shrimp Cocktail is more than just a recipe; it’s a celebration of vibrant flavors and simple ingredients coming together. Whether you’re hosting friends or treating yourself, this dish is guaranteed to impress. Now that you’ve got the steps and tips, it’s time to dive into this refreshing, zesty delight.

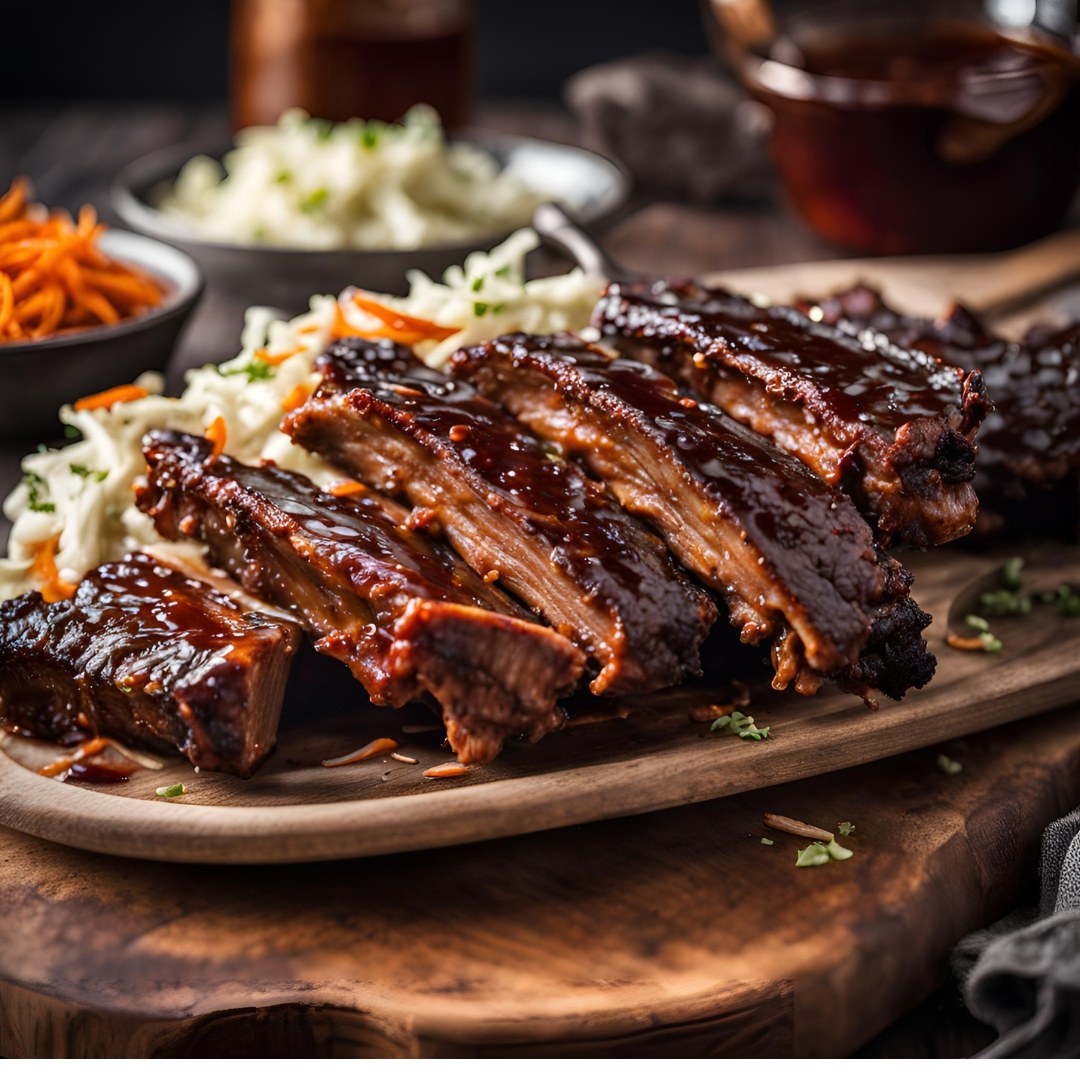
SLOW COOKER BBQ RIBS

“Nothing brings people together like the smell of barbecue. Picture this: tender, juicy ribs that fall right off the bone with each bite, infused with a smoky BBQ flavor—all without hours over a hot grill. With a slow cooker, you can create crowd-pleasing BBQ ribs that are effortless to make and bursting with flavor.”


Why Make BBQ Ribs in a Slow Cooker?

  • Explain the convenience and benefits of using a slow cooker, especially for busy people or those without access to a grill or smoker.
  • Highlight how slow cooking enhances the tenderness of the meat, making it ideal for ribs.
  • Mention that it’s a no-fuss, hands-off method that lets the flavors develop over time.

Ingredients for Slow Cooker BBQ Ribs

  • Create a table with the necessary ingredients, dividing them into sections for ribs, dry rub, and BBQ sauce for better readability.
IngredientQuantityNotes
Baby back ribs2 racksAbout 3 pounds, membrane removed
Brown sugar1/4 cupFor the dry rub; adds caramelization
Paprika1 tbspAdds smokiness
Garlic powder1 tspEnhances savory flavor
Salt1 tspBrings out the flavors
Black pepper1/2 tspAdds a touch of heat
Onion powder1/2 tspAdds depth
BBQ sauce1 cupUse your favorite brand or homemade
Apple cider vinegar1 tbspOptional; adds acidity to the sauce

Step-by-Step Guide to Making Slow Cooker BBQ Ribs

  1. Prepare the Ribs
    • Describe the process of removing the membrane from the ribs for tenderness.
    • Pat the ribs dry with paper towels to ensure the dry rub sticks well.
  2. HApply the Dry Rub
    • Detail the process of mixing and massaging the dry rub onto the ribs.
    • Mention how the spices penetrate the meat during slow cooking, adding layers of flavor.
  3. Place the Ribs in the Slow Cooker
    • Explain how to fit the ribs by cutting them to fit or placing them in a standing position.
    • Add a few tablespoons of BBQ sauce or apple cider vinegar for added flavor and moisture.
  4. Slow Cook to Perfection
    • Explain recommended cooking times: Low for 7-8 hours or High for 4-5 hours.
    • Emphasize the importance of slow cooking for tender ribs that fall off the bone.
  5. Finish Under the Broiler for a Crispy Glaze
    • Describe how to brush the ribs with BBQ sauce and broil them for a caramelized, sticky finish.
    • Include a tip for brushing additional sauce midway to enhance the glaze.

Tips for the Best Slow Cooker BBQ Ribs

  • Choose the Right Ribs: Explain why baby back ribs work best for this recipe but spare ribs are also a great option.
  • Customize the Dry Rub: Encourage readers to experiment with spices based on their preferences.
  • Don’t Skip the Broiling Step: Mention how this quick step adds texture and appeal, making the ribs taste like they’ve come straight from the grill.

Serving Suggestions for BBQ Ribs

  • Suggested Sides: Include classic BBQ sides like coleslaw, cornbread, baked beans, and mashed potatoes.
  • Garnishes and Presentation: Suggest garnishing with freshly chopped parsley or green onions for a burst of color.
  • Serving Ideas: Tips on serving for family dinners, game day gatherings, or casual summer BBQs.

Slow Cooker BBQ Ribs Recipe FAQ

  1. Can you cook frozen ribs in a slow cooker?
    No, it’s best to thaw the ribs before slow cooking for even cooking and safety.
  2. What type of BBQ sauce should I use?
    Use any BBQ sauce you love; sweet, smoky, and tangy flavors all work well with ribs.
  3. Can I make these ribs spicy?
    Absolutely! Add cayenne pepper or chili powder to the dry rub for a spicy kick.
  4. How do I store leftover ribs?
    Store in an airtight container in the refrigerator for up to 3 days. Reheat in the oven or microwave.

Conclusion: Enjoy Tender, Flavorful BBQ Ribs with Ease

Summarize the convenience and satisfaction of making delicious BBQ ribs in a slow cooker. Encourage readers to try this method for an effortless, restaurant-quality meal they can make any day of the week. Remind them that slow cooking yields tender, fall-off-the-bone meat with deep flavor that’s bound to impress friends and family alike.

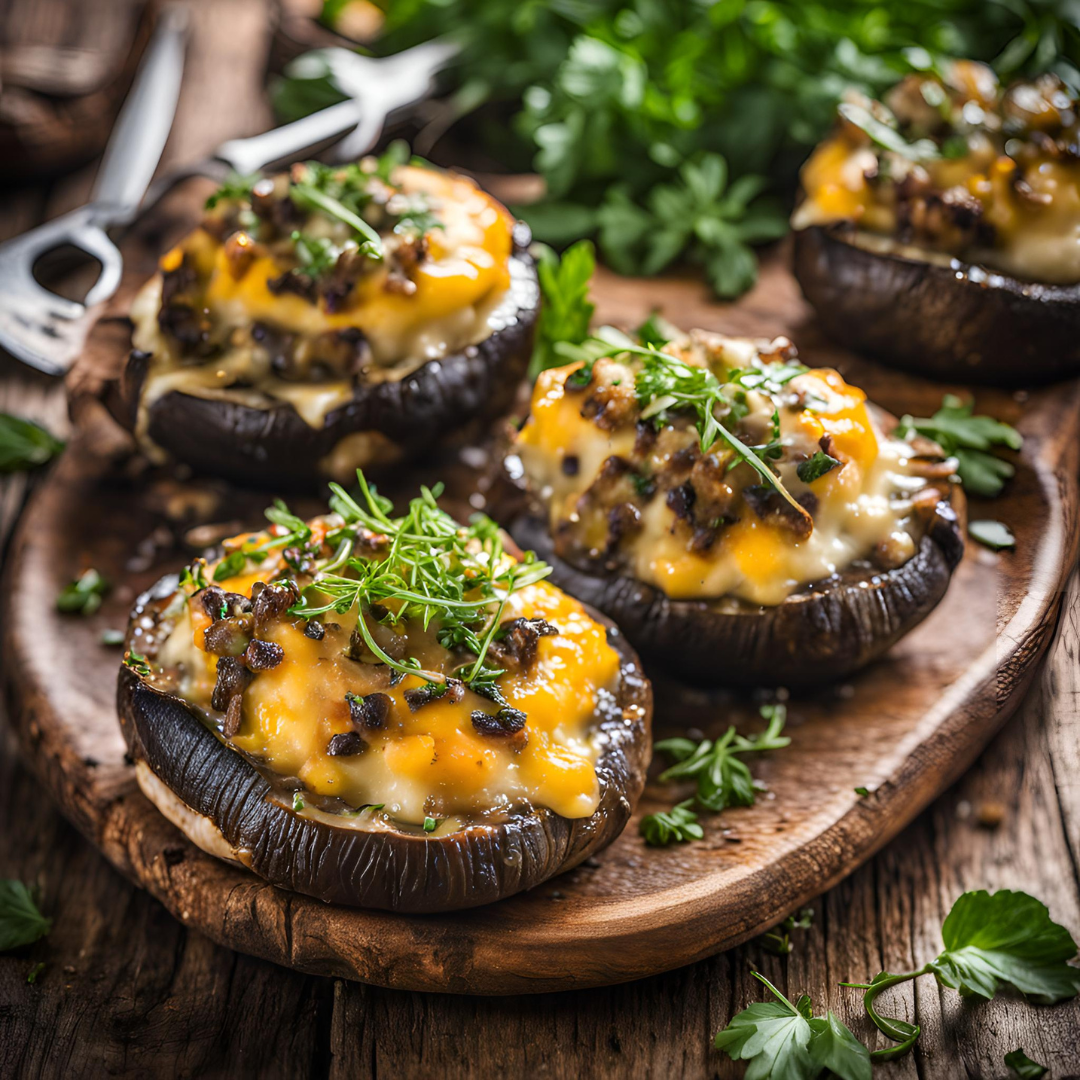
STUFFED PORTOBELLO MUSHROOMS

“Imagine biting into a juicy, savory portobello mushroom filled with melted cheese, aromatic herbs, and fresh vegetables. It’s a dish that feels indulgent yet healthy, making it perfect for anyone looking to enjoy a comforting meal without guilt. Whether you’re a seasoned chef or new to cooking, stuffed portobello mushrooms are a satisfying, easy-to-master dish that’s sure to impress.”

Why Stuffed Portobello Mushrooms Are the Perfect Healthy Meal

  • Nutritional Benefits of Portobello Mushrooms
    • Rich in essential vitamins like B-vitamins, vitamin D, and minerals (selenium, potassium)
    • Low-calorie, high-fiber, and ideal for low-carb and keto diets
    • High in antioxidants and immune-boosting properties
  • Versatility for Different Diets
    • Easy to adapt for vegetarian, vegan, keto, and gluten-free diets
    • Ideal for lunch, dinner, or as an appetizer for gatherings

Ingredients Needed for Stuffed Portobello Mushrooms Recipe

Ingredient Quantity Notes
Portobello mushrooms 4 large caps Choose fresh, firm mushrooms
Olive oil 2 tbsp For brushing and sautéing
Garlic 2 cloves Finely minced
Breadcrumbs 1/2 cup Use gluten-free if needed
Mozzarella cheese 1/2 cup grated Substitute with vegan cheese if needed
Parmesan cheese 1/4 cup grated Optional, for added flavor
Fresh spinach 1/2 cup chopped Adds nutrition and flavor
Salt and pepper To taste Season to personal preference

Step-by-Step Guide to Making Perfect Stuffed Portobello Mushrooms

  • Step 1: Prepping the Mushrooms
    • Gently clean the mushroom caps and remove the stems.
    • Brush with olive oil and season with salt and pepper for enhanced flavor.
  • Step 2: Preparing the Filling
    • Sauté garlic in olive oil until fragrant.
    • Add spinach, cooking until wilted.
    • Mix in breadcrumbs, mozzarella, and Parmesan cheese.
  • Step 3: Stuffing and Baking
    • Spoon filling into each mushroom cap.
    • Arrange on a baking sheet and bake at 400°F (200°C) for about 20 minutes or until golden and bubbly.
  • Step 4: Garnishing and Serving
    • Remove from the oven and garnish with fresh herbs like parsley or basil.
    • Serve hot with a side salad or as a main dish with your favorite side.

Tips for Customizing Stuffed Portobello Mushrooms

  • Vegetarian or Vegan Modifications
    • Replace cheese with vegan alternatives or add nutritional yeast for a cheesy flavor.
  • Keto-Friendly Variations
    • Omit breadcrumbs and use almond flour or crushed nuts as a topping.
  • Extra Flavor Additions
    • Add sun-dried tomatoes, pine nuts, or even a sprinkle of chili flakes for spice lovers.

Health Benefits of Eating Portobello Mushrooms

  • Antioxidant-Rich Food
    • High levels of ergothioneine, an antioxidant that helps reduce inflammation.
  • Supports Weight Management
    • Low in calories yet filling, making them ideal for weight management.
  • Improves Heart Health
    • Contains potassium, which helps maintain healthy blood pressure levels.

Frequently Asked Questions about Stuffed Portobello Mushrooms

  • Can I Make Stuffed Portobello Mushrooms Ahead of Time?
    • Yes, you can prepare the filling and clean the mushrooms ahead of time. Store them separately and assemble right before baking.
  • Are Stuffed Portobello Mushrooms Keto-Friendly?
    • Absolutely! Just use keto-friendly ingredients like almond flour instead of breadcrumbs.
  • Can I Freeze Stuffed Portobello Mushrooms?
    • It’s not recommended to freeze them as the mushrooms can become watery when thawed. However, you can prepare the filling in advance and freeze it.

Conclusion: Why You’ll Love Stuffed Portobello Mushrooms

Summarize the versatility, flavor, and health benefits of stuffed portobello mushrooms. Emphasize how easy they are to prepare and encourage readers to try the recipe as a way to enjoy a delicious, nutritious meal.

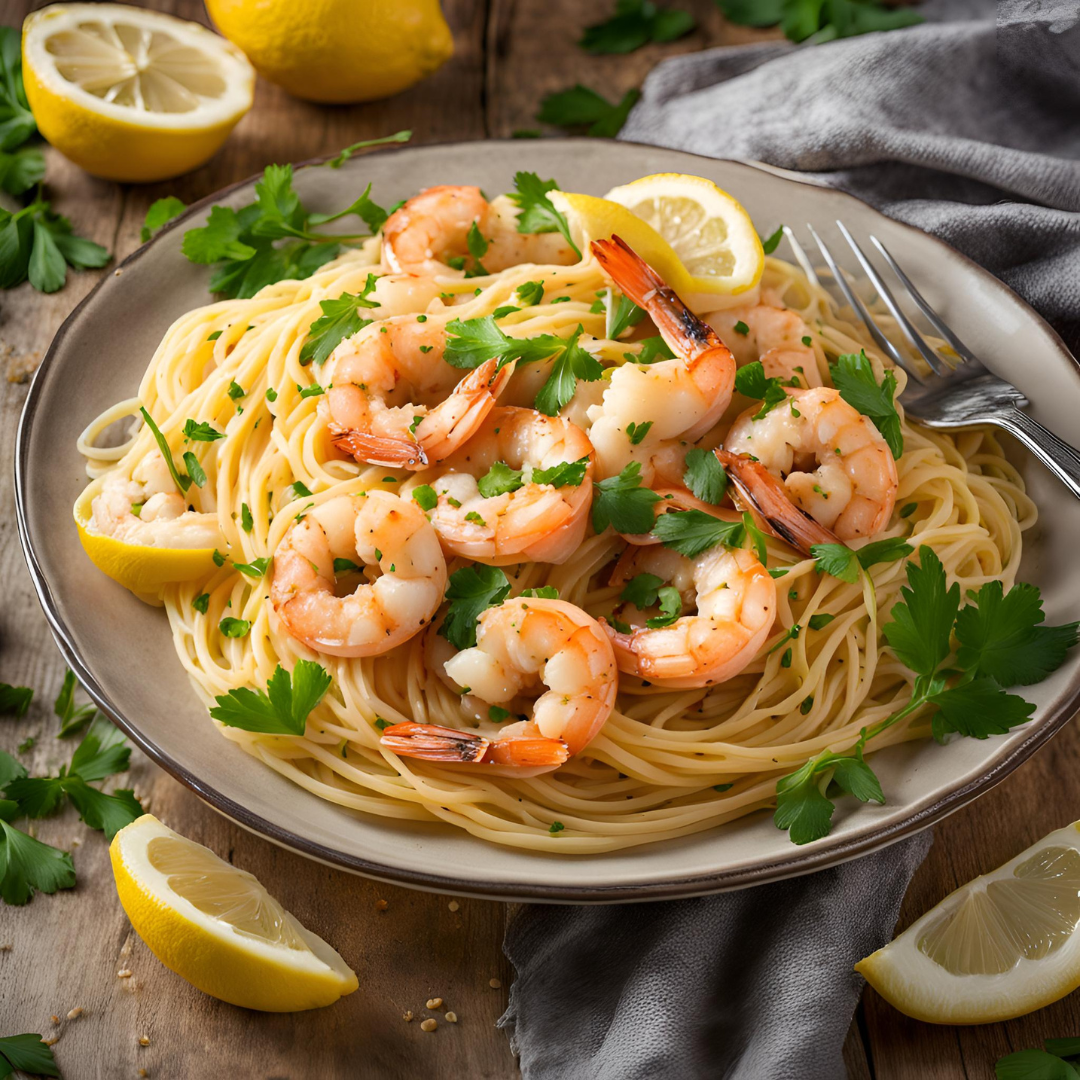
LEMON GARLIC BUTTER SHRIMP PASTA

Introduction:

Imagine coming home to the aroma of garlic and butter, mingling with the brightness of fresh lemon and juicy shrimp. Lemon Garlic Butter Shrimp Pasta is a meal that feels luxurious yet takes minimal time and effort to prepare. Whether it’s a weeknight dinner or a special meal to impress friends, this recipe will quickly become a favorite.


Why You’ll Love This Lemon Garlic Butter Shrimp Pasta

  • Brief Introduction: Outline why this dish is popular and ideal for home cooks.
  • Key Points:
    • Fast and Easy: Can be ready in under 30 minutes.
    • Balanced Flavors: The lemon adds brightness, garlic adds depth, and butter brings richness.
    • Perfect for Any Occasion: Great for both casual meals and special dinners.
  • Optional Data/Source: Brief mention of shrimp and lemon-based recipes’ popularity in Mediterranean and Italian-inspired cuisines.

Ingredients for the Best Lemon Garlic Butter Shrimp Pasta

  • Ingredient Overview: List and explain each ingredient’s role in creating the dish’s signature flavors.
  • Table of Ingredients: For quick and easy reference.IngredientQuantityPurposeShrimp1 lb, peeledThe main protein, juicy and flavorfulPasta8 ozBase of the dish, absorbs the flavorsButter3 tbspAdds richness and smoothness to the sauceGarlic4 cloves, mincedInfuses deep flavor and aromaLemon1 large, juicedProvides brightness and zestinessSalt & PepperTo tasteEnhances overall flavorsFresh ParsleyFor garnishAdds freshness and color
  • Ingredient Alternatives: Suggestions for gluten-free pasta, adding a touch of red pepper flakes for heat, or using ghee instead of butter.

Step-by-Step Guide to Making Lemon Garlic Butter Shrimp Pasta

  • Step 1 – Prepare the Pasta
    • Description: Cook pasta according to package instructions until al dente.
    • Key Tips:
      • Salt the water generously for better flavor.
      • Reserve a cup of pasta water to adjust the sauce’s consistency if needed.
  • Step 2 – Sauté the Shrimp in Garlic Butter
    • Description: Melt butter, add garlic, then add shrimp and cook until pink.
    • Key Points:
      • Use medium-high heat to get a nice sear on the shrimp.
      • Avoid overcooking to keep shrimp tender and juicy.
  • Step 3 – Add Lemon and Combine with Pasta
    • Description: Add lemon juice to the shrimp mixture, then toss with pasta.
    • Key Tips:
      • Toss until pasta is fully coated with sauce.
      • Add a splash of pasta water if needed for a creamier texture.
  • Step 4 – Garnish and Serve
    • Description: Finish with fresh parsley and serve hot.
    • Key Points:
      • Adding fresh parsley not only adds flavor but also makes the dish look more vibrant.
      • Serve immediately for the best flavor and texture.

Variations and Tips for Perfect Lemon Garlic Butter Shrimp Pasta

  • Make It Spicy
    • Add crushed red pepper flakes or diced chili for a little heat.
  • Add Vegetables for Extra Flavor and Nutrition
    • Suggestions: Add asparagus, cherry tomatoes, or spinach for extra color and flavor.
  • Use Whole Wheat or Gluten-Free Pasta
    • Options for alternative pasta types to accommodate different dietary needs.
  • For a Creamier Texture
    • Adding a splash of heavy cream or a sprinkle of Parmesan cheese to the sauce will make it richer.

Health Benefits of Lemon Garlic Butter Shrimp Pasta

  • Overview of Health Benefits: Discuss the benefits of shrimp, garlic, and lemon.
    • Shrimp: High in protein and low in calories.
    • Garlic: Known for its immune-boosting and anti-inflammatory properties.
    • Lemon: High in vitamin C and antioxidants.
  • Note: Mention that this dish is filling and nutrient-dense, especially with added veggies or whole wheat pasta.

FAQs about Lemon Garlic Butter Shrimp Pasta

  • What type of pasta works best for this recipe?
    • Answer: Linguine, spaghetti, or fettuccine are ideal, but you can use any pasta you like.
  • Can I use frozen shrimp?
    • Answer: Yes, just thaw and drain them thoroughly before cooking.
  • How can I make this dish dairy-free?
    • Answer: Substitute butter with olive oil or a vegan butter alternative.
  • Is this recipe suitable for meal prep?
    • Answer: Yes, but it’s best to keep the shrimp and pasta separate and combine when reheating.

Conclusion

  • Summary: Reiterate the ease and versatility of the Lemon Garlic Butter Shrimp Pasta. This recipe is ideal for weeknights yet impressive enough for guests.

BEEF STIR-FRY

Introduction:

Imagine coming home after a long day and whipping up a hot, flavorful meal in just minutes. This Beef Stir-Fry recipe is exactly what you need – tender beef, fresh veggies, and a savory sauce all cooked in one pan. It’s the ideal dish when you’re craving something fast, delicious, and comforting!


Why Beef Stir-Fry is the Perfect Go-To Recipe

  • Introduction to Beef Stir-Fry: Explain why this dish is loved worldwide.
  • Key Points:
    • Quick to prepare, using a single pan.
    • Flexible – you can use a variety of vegetables and seasonings.
    • Perfect for both weeknight dinners and special occasions.
  • Data/Source Suggestions: Mention stir-fry’s popularity in various cultures and as a common takeout favorite.

Ingredients Needed for the Best Beef Stir-Fry

  • Brief Overview: List and describe key ingredients for a flavorful beef stir-fry.
  • Ingredients Table: Provide a table for quick reference.IngredientQuantityPurposeBeef strips1 lbMain proteinSoy sauce1/4 cupAdds umami flavorGarlic3 cloves, mincedAromatic baseGinger1 tbsp, gratedAdds warmth and depthBell peppers1 cup slicedAdds color and sweetnessBroccoli1 cupProvides crunch and fiberCornstarch1 tbspThickens the sauceVegetable oil2 tbspFor sautéing the ingredients
  • Notes on Substitutions: Offer alternatives, such as using chicken or tofu instead of beef for a variation.

Step-by-Step Guide to Making Beef Stir-Fry

  • Introduction to the Process: Outline the main steps briefly.
  • Step 1: Marinate the Beef
    • Description: Marinate the beef strips in soy sauce, garlic, and ginger for flavor.
    • Key Points:
      • Marinating for at least 15 minutes enhances tenderness and flavor.
      • Optional additions: a dash of sesame oil or chili flakes for extra taste.
  • Step 2: Prepare the Vegetables
    • Description: Slice bell peppers, broccoli, and any other vegetables.
    • Key Points:
      • Choose a mix of colors for visual appeal.
      • Keep slices uniform for even cooking.
  • Step 3: Sauté the Beef
    • Description: Quickly cook the beef over medium-high heat until browned.
    • Key Points:
      • Avoid overcrowding the pan for a better sear.
      • Remove beef when it’s just cooked to avoid overcooking.
  • Step 4: Cook the Vegetables
    • Description: Add vegetables to the same pan and sauté until tender-crisp.
    • Key Points:
      • Add harder vegetables (like carrots) first, then softer ones like bell peppers.
      • Maintain a high heat for that stir-fry texture.
  • Step 5: Add Sauce and Combine
    • Description: Add soy sauce, a bit of cornstarch mixed with water, and return beef to the pan.
    • Key Points:
      • Stir well to coat everything in the sauce.
      • Adjust seasoning as needed with more soy sauce, salt, or pepper.

Flavor Variations for Beef Stir-Fry

  • Introduction to Variations: Encourage readers to customize their stir-fry.
  • Make It Spicy
    • Add chili sauce or sliced fresh chilies to the sauce.
  • Go for a Sweeter Flavor
    • Add a touch of honey or hoisin sauce for a sweet-savory balance.
  • Try Different Vegetables
    • Use snap peas, zucchini, mushrooms, or any other favorites.
  • Substitute the Protein
    • Swap beef for chicken, shrimp, or tofu for a different twist.

Tips for Perfect Beef Stir-Fry Every Time

  • Overview: Practical tips to make your beef stir-fry successful.
  • Key Tips:
    • High Heat Cooking: Prevents ingredients from steaming and keeps them crisp.
    • Slice Beef Thinly: Ensures quick, even cooking.
    • Use Fresh Ingredients: Adds better flavor and crunch.
    • Avoid Overcrowding the Pan: Cook in batches if necessary to maintain high heat.

FAQ Section

  • What’s the best cut of beef for stir-fry?
    • Answer: Flank steak, sirloin, or ribeye work well for their tenderness and flavor.
  • Can I make stir-fry ahead of time?
    • Answer: Yes, you can prep ingredients, but cook fresh for the best texture.
  • How can I thicken the stir-fry sauce?
    • Answer: Add a cornstarch slurry (1 tbsp cornstarch mixed with 1 tbsp water) to the pan.
  • Can I use frozen vegetables?
    • Answer: Yes, but be sure to thaw and drain them well to avoid excess moisture.

Conclusion

  • Summary: Recap the ease and versatility of making beef stir-fry at home.

SHRIMP TACOS WITH MANGO SALSA


Imagine biting into a warm, soft tortilla filled with juicy, spiced shrimp, topped with sweet, refreshing mango salsa. These Shrimp Tacos with Mango Salsa are a tropical twist on classic tacos – perfect for a quick weeknight meal or impressing friends on taco night! In this guide, you’ll learn everything you need to make these fresh, vibrant tacos that are sure to be a hit.


What Makes Shrimp Tacos with Mango Salsa So Delicious?

  • Introduction to Shrimp Tacos with Mango Salsa: Briefly explain the unique flavor profile of shrimp and mango.
  • Key Points:
    • The sweetness of mango balances the savory and spicy shrimp.
    • Light, refreshing flavors that are perfect for any season.
  • Data/Source Suggestions: Include statistics on the popularity of shrimp tacos and tropical flavors.

Why You’ll Love Shrimp Tacos with Mango Salsa

  • Introduction to Benefits of Shrimp Tacos with Mango Salsa: Explain why this recipe is an easy favorite.
  • Key Points:
    • Quick and simple to make – ideal for weeknights.
    • Packed with fresh, wholesome ingredients.
    • Customizable with various toppings and spice levels.
  • Emotionally Resonant Appeal: Describe the joy of serving a refreshing, flavorful dish that everyone loves.

Ingredients You’ll Need for Shrimp Tacos with Mango Salsa

  • Brief Overview: List the essential ingredients and their purpose.
  • Ingredients Table: Provide a clear table of ingredients with quantities.IngredientQuantityPurposeFresh shrimp1 lbMain protein, savory baseMango1 largeSweet, tropical flavorRed onion1/2 cup dicedAdds crunch and zestCilantro1/4 cup choppedFresh garnishLime juice2 tbspAdds brightness and acidityTortillas8 smallSoft base for tacos
  • Notes on Substitutions: Mention possible ingredient swaps, like using pineapple instead of mango for a different flavor.

Step-by-Step Guide to Making Shrimp Tacos with Mango Salsa

  • Introduction to the Process: A quick overview of the steps to make the recipe.
  • Step 1: Preparing the Shrimp
    • Description: Marinate shrimp with spices for extra flavor.
    • Key Points:
      • Suggested spices: chili powder, cumin, garlic powder.
      • Let shrimp marinate for 10–15 minutes for deeper flavor.
  • Step 2: Making the Mango Salsa
    • Description: Combine fresh mango, red onion, cilantro, and lime juice.
    • Key Points:
      • Adjust sweetness or heat by adding diced jalapeño or honey.
      • Salsa can be made ahead for enhanced flavor.
  • Step 3: Cooking the Shrimp
    • Description: Sauté shrimp in a skillet over medium heat until pink.
    • Key Points:
      • Shrimp cook quickly, in about 2–3 minutes per side.
      • Avoid overcooking for tender, juicy texture.
  • Step 4: Assembling the Tacos
    • Description: Place shrimp and mango salsa on warm tortillas, then add extra toppings.
    • Suggested Toppings: Avocado slices, shredded cabbage, sour cream, hot sauce.
    • Serving Tip: Warm tortillas for a soft, pliable base.

Flavor Variations and Customization Ideas for Shrimp Tacos

  • Introduction to Variations: Encourage readers to personalize their tacos.
  • Make It Spicy
    • Add diced jalapeños or chili flakes to the shrimp marinade or salsa.
  • Try Different Toppings
    • Sliced avocados, crumbled queso fresco, or even pickled onions for a twist.
  • Vegan or Vegetarian Option
    • Substitute shrimp with seasoned, grilled veggies like mushrooms or zucchini.

Tips for Perfect Shrimp Tacos with Mango Salsa Every Time

  • Brief Overview: Practical tips for the best results.
  • Key Tips:
    • Use Fresh, Ripe Mango: Ensures the best flavor in the salsa.
    • Warm Tortillas Properly: Use a skillet or grill to warm tortillas for better texture.
    • Marinate Shrimp Briefly: Keeps the shrimp tender and flavorful.

FAQ Section

  • Can I use frozen shrimp for shrimp tacos?
    • Answer: Yes, thaw shrimp before marinating and cooking for best results.
  • How do I store leftover mango salsa?
    • Answer: Store in an airtight container in the fridge for up to 2 days.
  • Can I make shrimp tacos ahead of time?
    • Answer: You can prepare the mango salsa and marinate the shrimp in advance, but cook shrimp fresh for the best texture.

Conclusion

  • Wrap-Up: Summarize the ease and enjoyment of making Shrimp Tacos with Mango Salsa at home.

LOADED POTATO SKINS

There’s something about a hot, crispy, cheese-loaded potato skin that brings people together. Whether you’re prepping for game day, a cozy night in, or looking for a quick appetizer, loaded potato skins are a go-to comfort food that’s always a hit. In this guide, you’ll learn how to make perfectly crispy, golden potato skins packed with gooey cheese, savory bacon, and your favorite toppings. Get ready to bring a little magic to your table with this classic favorite!


What Are Loaded Potato Skins?

  • Brief Overview: Explain what loaded potato skins are and why they’re so popular.
  • Key Points:
    • Bite-sized, crispy potato shells filled with cheese, bacon, and toppings.
    • Popularity as a versatile appetizer or party food.
  • Data/Source Suggestions: Mention the popularity of loaded potato skins at restaurants and in home-cooked meals.

Why You’ll Love Making Loaded Potato Skins at Home

  • Introduction to Benefits of Homemade Potato Skins: Discuss the joys and advantages of preparing this classic dish from scratch.
  • Key Points:
    • Fresh, customizable, and cost-effective.
    • Control over ingredients and flavor.
    • Fun and easy to make with kids or for parties.
  • Emotionally Resonant Appeal: Emphasize the rewarding feeling of making these and seeing family and friends enjoy them.

Ingredients You’ll Need for Loaded Potato Skins

  • Brief Overview: Outline the essential ingredients for perfect loaded potato skins.
  • Ingredients Table: Provide a table format for a clear, organized view of ingredients and quantities.IngredientQuantityPurposeRusset potatoes4 largeMain ingredientCheddar cheese1 cup, shreddedMelty, cheesy goodnessBacon4 strips, cooked and crumbledSavory, crispy textureSour cream1/2 cupCreamy toppingChopped chives2 tbspFresh garnish
  • Note: Mention that these ingredients can be easily adjusted or swapped for different flavors.

Step-by-Step Guide to Making Perfect Loaded Potato Skins

  • Introduction: Briefly mention how easy it is to follow these steps for a perfect result.
  • Step 1: Preparing the Potatoes
    • Description: Bake or microwave potatoes, then cool and cut in half.
    • Key Points:
      • Scoop out the flesh, leaving a thin layer for structure.
      • Save scooped potato for other recipes, reducing waste.
  • Step 2: Crisping the Potato Skins
    • Description: Brush or spray the potato skins with oil and bake for extra crispiness.
    • Key Points:
      • Importance of achieving a crispy outer shell before adding toppings.
      • Bake at 400°F for 10–15 minutes.
  • Step 3: Loading Up with Toppings
    • Description: Layer cheese and bacon on each potato skin and bake until cheese melts.
    • Key Points:
      • Suggested bake time for melted cheese (about 5–10 minutes).
      • Tips on adding alternative toppings, such as veggies, jalapeños, or sour cream.

Topping Ideas and Flavor Variations for Loaded Potato Skins

  • Introduction to Customizing Potato Skins: Encourage readers to experiment with flavors.
  • Classic Loaded Potato Skins Toppings
    • Cheddar cheese, bacon, sour cream, and chives.
  • Alternative Toppings to Try
    • Mexican Style: Shredded Monterey Jack, black beans, jalapeños, and salsa.
    • Vegetarian Option: Sautéed mushrooms, caramelized onions, and spinach.
    • Breakfast Loaded Skins: Cheddar cheese, scrambled eggs, sausage crumbles.
    • Spicy Twist: Pepper jack cheese, diced jalapeños, and hot sauce drizzle.

Tips and Tricks for Making the Best Loaded Potato Skins

  • Brief Overview: Provide practical tips to ensure excellent results.
  • Key Tips:
    • Using Russet Potatoes: Best for achieving crispy skins.
    • Double-Baking Method: Ensures a perfectly crisp texture.
    • Serve Fresh: Loaded potato skins are best served immediately for peak flavor.

FAQ Section

  • How do you keep loaded potato skins crispy?
    • Answer: Crisp them in the oven before adding toppings, and avoid overloading with wet ingredients.
  • What’s the best way to reheat loaded potato skins?
    • Answer: Bake at 350°F for 10–15 minutes to maintain crispiness.
  • Can you make loaded potato skins ahead of time?
    • Answer: Yes! Prepare the skins in advance and add toppings right before reheating.

Conclusion

  • Wrap-Up: Encourage readers to try making loaded potato skins at home and remind them of the customizability and fun involved.
  • Call-to-Action: Suggest sharing photos of their creations or their own topping ideas in the comments.

CRISPY FRIED CHICKEN

There’s nothing quite like the satisfying crunch of perfectly crispy fried chicken. Whether it reminds you of family picnics, weekend dinners, or that comforting meal after a long day, crispy fried chicken holds a special place in our hearts. In this guide, you’ll learn exactly how to create golden-brown, juicy fried chicken that delivers that crave-worthy crunch every single time. Get ready to master the art of fried chicken with simple, proven techniques that even beginners can follow!


What Is Crispy Fried Chicken?

  • Brief Explanation: Describe what makes fried chicken crispy and why it’s so beloved.
  • Key Points:
    • Unique characteristics: golden, crunchy crust, tender, juicy interior.
    • Popularity in comfort foods and various cuisines around the world.
  • Data/Source Suggestions: Quote data on the popularity of fried chicken in the US or globally.

The Secret to Perfectly Crispy Fried Chicken Every Time

  • Introduction to Techniques for Crispy Fried Chicken:
    • Brief Overview: Highlight the core secrets to crispy fried chicken, emphasizing tips readers might not know.
    • Key Points:
      • Importance of double-coating or dredging
      • Using the right type of oil and frying temperature
      • Timing and resting techniques for crunchier results

Ingredients for the Best Crispy Fried Chicken Recipe

  • Brief Explanation: Overview of ingredients and their role in achieving perfect texture and flavor.
  • Ingredients Table: Break down ingredients into a table with quantities, providing readers with a clear, easy-to-follow format.
    • Example Table:IngredientQuantityPurposeChicken pieces6-8Protein baseButtermilk2 cupsAdds tendernessAll-purpose flour2 cupsCoats chicken for crispinessSalt1 tbspEnhances flavorPepper, Paprika, Garlic1 tsp eachAdds depth of flavor

Step-by-Step Guide to Making Crispy Fried Chicken

  • Step 1: Preparing the Chicken
    • Description: Soak chicken in buttermilk and seasonings.
    • Key Points:
      • Importance of marination time (1–4 hours recommended for tenderness and flavor).
  • Step 2: Creating the Perfect Dredge
    • Description: Detail how to season the flour and apply it properly.
    • Key Points:
      • Double-dredging method for extra crispiness
      • Adding spices to the flour for enhanced flavor.
  • Step 3: Frying for Crispy Perfection
    • Description: Guide on heating the oil and frying.
    • Key Points:
      • Ideal oil temperature (350–375°F).
      • Tips for maintaining oil temperature.
    • Cooking Time: Estimated 12–15 minutes, depending on thickness.

Tips and Tricks for Perfect Fried Chicken Every Time

  • Introduction to Key Tips: Mention some often-overlooked tips for making the best fried chicken.
  • Key Tips:
    • Using a Thermometer: Ensures precise cooking and oil temperature.
    • Drain on a Wire Rack: Avoids soggy bottoms and keeps chicken crispy.
    • Resting Period: Allow the chicken to sit for 5–10 minutes for peak crunch.

Different Variations of Crispy Fried Chicken

  • Buttermilk Fried Chicken
    • Briefly explain how buttermilk enhances tenderness and flavor.
  • Korean-Style Crispy Fried Chicken
    • Mention the double-frying technique for a crunchier texture.
    • Note the use of gochujang or sweet chili sauce.
  • Gluten-Free Fried Chicken
    • Suggest alternative flours (rice flour, cornstarch) for gluten-free coating.

FAQ Section

  • What oil is best for frying crispy chicken?
    • Answer: Oils with high smoke points, like peanut or canola oil, work best.
  • Why isn’t my fried chicken crispy?
    • Answer: Discuss issues like improper oil temperature, overloading the pan, and inadequate coating.
  • How long should I fry chicken for?
    • Answer: Typically 12–15 minutes, depending on size; internal temp should reach 165°F.

Conclusion

  • Wrap-Up: Summarize the key takeaways and encourage readers to try the recipe at home.
  • Call-to-Action: Invite readers to share their own tips or variations in the comments or to try the recipe with family and friends.

STUFFED BELL PEPPERS

Opening: The Comfort of Stuffed Bell Peppers

  • Emotionally Resonant Introduction:
    • Begin by evoking a sense of warmth and home, describing how stuffed bell peppers can bring comfort and joy to any dinner table.
    • Share a relatable personal anecdote (e.g., “Growing up, stuffed bell peppers were the centerpiece of family dinners—each bite was a perfect mix of savory flavors wrapped in a colorful, vibrant bell pepper.”).
    • Mention how stuffed bell peppers are versatile, easy to make, and loved by both kids and adults alike, making them perfect for busy families or intimate dinners.
    Key Points:
    • Comfort food that appeals to all ages
    • Versatility in flavors and ingredients
    • A healthy, balanced meal option

What Are Stuffed Bell Peppers?

  • Definition and Background:
    • Explain what stuffed bell peppers are, emphasizing the filling of ground meat, vegetables, rice, and cheese, all packed inside a bell pepper.
    • Briefly cover the history of stuffed peppers, touching on variations across different cultures (e.g., Mediterranean, Mexican, Italian).
    Key Points:
    • Origins of stuffed bell peppers (e.g., variations in different cuisines)
    • Classic fillings and the diversity of modern variations

Why You Should Make Stuffed Bell Peppers

  • Health Benefits:
    • Discuss the nutritional benefits of bell peppers (rich in vitamins A, C, and antioxidants) and how they make for a balanced, healthy meal when stuffed with lean meats, whole grains, and vegetables.
    • Address dietary considerations (e.g., gluten-free, low-carb, vegetarian, etc.), explaining how stuffed peppers can be customized to suit different dietary needs.
    Key Points:
    • Nutritional value of bell peppers
    • Customizable for various diets
    • Perfect for weight management or boosting immunity
  • Convenience & Time-Saving:
    • Stress how stuffed peppers can be prepared in advance, making them ideal for meal prep.
    • Mention that they are great for busy weeknights and even work well for batch cooking.
    Key Points:
    • Easy to prepare and store for later
    • Time-saving for busy families or meal preppers

How to Make Stuffed Bell Peppers: Step-by-Step Guide

Ingredients You’ll Need

  • Table of Ingredients:
IngredientQuantityNotes
Bell Peppers4-6 peppersRed, yellow, green, or orange bell peppers
Ground Beef or Turkey1 lbCan substitute with chicken or plant-based protein
Rice (cooked)1 cupWhite, brown, or cauliflower rice
Onion1 smallFinely chopped
Garlic2 clovesMinced
Tomato Sauce1 cupOptional: add diced tomatoes
Spices (e.g., cumin, chili powder)1 tbspAdjust to taste
Cheese (shredded)1 cupMozzarella or cheddar works well
Fresh Herbs (optional)2 tbspParsley, basil, or cilantro
  • Key Points:
    • Emphasize the flexibility in choosing ingredients based on personal preferences.
    • Offer variations (e.g., swapping rice for quinoa, using vegan cheese, etc.).

Instructions for Making Stuffed Bell Peppers

  1. Prep the Peppers:
    • Cut off the tops of the bell peppers and remove the seeds and membranes.
    • Optionally, blanch the peppers in boiling water for a few minutes to soften them.
  2. Prepare the Filling:
    • Brown the ground meat (or alternative) in a skillet, breaking it apart as it cooks.
    • Add onion and garlic, sautéing until fragrant.
    • Stir in rice, spices, and tomato sauce. Cook for a few minutes to let the flavors blend.
  3. Stuff the Peppers:
    • Spoon the prepared filling into each bell pepper, pressing it down gently.
    • Top each stuffed pepper with shredded cheese.
  4. Bake:
    • Place the stuffed peppers in a baking dish, and cover with foil. Bake at 375°F (190°C) for 25-30 minutes, then remove the foil and bake for another 10 minutes until the cheese is melted and bubbly.
  • Key Points:
    • Highlight the simplicity of the process.
    • Mention how you can customize fillings and add extras like beans or corn.

Variations of Stuffed Bell Peppers: Make Them Your Own

  • Popular Variations:
    • Mexican Stuffed Peppers: Use taco seasoning, black beans, and corn. Top with guacamole or sour cream.
    • Italian Stuffed Peppers: Incorporate marinara sauce, Italian sausage, and basil.
    • Vegetarian Stuffed Peppers: Fill with quinoa, beans, mushrooms, and cheese for a meatless option.
  • Healthy Alternatives:
    • Low-Carb: Use cauliflower rice instead of traditional rice for a lighter version.
    • Gluten-Free: Ensure all ingredients, including spices and sauces, are certified gluten-free.
  • Key Points:
    • Encourage readers to experiment with their own combinations based on taste preferences or dietary needs.
    • Mention that stuffed peppers can also be made in a slow cooker or Instant Pot for even more convenience.

Tips for Perfect Stuffed Bell Peppers Every Time

  • Cooking Tips:
    • Pre-cook the rice or other grains to avoid undercooked fillings.
    • Use lean meats to keep the dish healthy and reduce grease.
    • For crispy tops, sprinkle additional cheese and bake uncovered in the last 10 minutes.
  • Storage Tips:
    • Store leftover stuffed peppers in an airtight container in the fridge for up to 4 days.
    • Stuffed peppers freeze well! Wrap them tightly and store in a freezer-safe container for up to 3 months.
  • Key Points:
    • Provide actionable tips for ensuring successful preparation and long-lasting freshness.

Serving Ideas: What to Pair with Stuffed Bell Peppers

  • Side Dishes:
    • Fresh salads (e.g., mixed greens or Greek salad)
    • Roasted vegetables (e.g., zucchini, asparagus, or sweet potatoes)
    • Crusty bread or garlic bread to soak up any extra sauce
  • Drinks:
    • Light, crisp white wine like Sauvignon Blanc or Pinot Grigio
    • Iced tea or a refreshing lemon-infused sparkling water
  • Key Points:
    • Suggest complementary sides and drinks that enhance the stuffed peppers’ flavors.

Frequently Asked Questions (FAQ)

Can I use any kind of bell pepper for stuffed peppers?

Yes! While red, yellow, and orange bell peppers are sweeter, green peppers are also great for stuffing. Feel free to use any color you prefer.

How do I make stuffed peppers without rice?

You can replace rice with quinoa, couscous, cauliflower rice, or even lentils to make a low-carb or gluten-free version.

Can I prepare stuffed bell peppers in advance?

Absolutely! Stuffed peppers can be prepped ahead of time and stored in the fridge for up to 24 hours before baking. You can also freeze them for later use.

How do I know when stuffed peppers are done?

The peppers are done when they are tender and the filling is heated through. The cheese on top should be golden and bubbly.


Conclusion:

Stuffed Bell Peppers are not just a meal—they’re a family favorite that’s easy to customize, fun to make, and packed with nutrition. Whether you’re looking for a quick weeknight dinner or preparing for a special occasion, this dish is a perfect choice. Don’t forget to experiment with different fillings and toppings to make it uniquely yours!

CUISINART ICE CREAM RECIPES

10 Irresistible Cuisinart Ice Cream Recipes for Every Sweet Tooth


Introduction

Emotional Hook:
There’s nothing like the joy of homemade ice cream—especially when it’s made with your very own Cuisinart ice cream maker. Imagine the thrill of mixing your favorite flavors, experimenting with textures, and watching it churn into creamy perfection right before your eyes. Whether you’re a vanilla lover or a chocolate fanatic, these Cuisinart ice cream recipes are perfect for your next sweet creation.


10 Irresistible Cuisinart Ice Cream Recipes for Every Sweet Tooth


Section 1: Why Choose a Cuisinart Ice Cream Maker?

  • Benefits of Making Ice Cream with a Cuisinart Ice Cream Maker
    • Control Over Ingredients: You get to choose the quality and quantity of ingredients.
    • Creative Freedom: Customize flavors, mix-ins, and sweetness levels to suit your taste.
    • Convenience: With Cuisinart’s fast-churn technology, enjoy fresh, homemade ice cream in as little as 20 minutes.

Section 2: Essential Ingredients for Cuisinart Ice Cream Recipes

Key Ingredients to Make the Perfect Cuisinart Ice Cream

Table of Essential Ingredients:

IngredientPurpose
Heavy CreamAdds richness and creaminess
Whole MilkProvides smooth texture
SugarSweetener
Vanilla ExtractEnhances base flavor
Optional Mix-InsCustom flavors and textures

Tips for Choosing Ingredients:

  • Use high-quality vanilla for richer flavor.
  • Try natural sweeteners like honey or agave for a unique twist.

Classic Cuisinart Ice Cream Recipes

Basic Recipes for Cuisinart Ice Cream Maker Beginners

Vanilla Ice Cream Recipe

  • Classic Vanilla Ice Cream
    • Rich, creamy, and deliciously smooth vanilla ice cream.
    • Ingredients: Heavy cream, whole milk, sugar, vanilla extract.
    • Instructions: Mix ingredients and pour into Cuisinart ice cream maker. Churn for 20-25 minutes.

Chocolate Ice Cream Recipe

  • Decadent Chocolate Ice Cream
    • An intense chocolate treat perfect for any chocolate lover.
    • Ingredients: Heavy cream, milk, sugar, cocoa powder, chocolate chips.
    • Add chocolate chips during the last 5 minutes of churning.

Creative Flavor Variations for Cuisinart Ice Cream Recipes

Unique Ice Cream Recipes to Try with Your Cuisinart

  • Strawberry Cheesecake Ice Cream
    • A creamy blend of strawberries and cream cheese for a tangy, fruity delight.
    • Ingredients: Heavy cream, cream cheese, sugar, strawberries.
    • Instructions: Blend cream cheese with cream, add sugar, and stir in fresh strawberries.
  • Mint Chocolate Chip Ice Cream
    • A refreshing minty treat with dark chocolate chunks.
    • Ingredients: Heavy cream, milk, sugar, peppermint extract, dark chocolate.
    • Tip: For extra color, add a few drops of green food coloring.

Dairy-Free and Vegan Cuisinart Ice Cream Recipes

Cuisinart Ice Cream Recipes for Dairy-Free Diets

  • Vegan Coconut Ice Cream
    • Smooth, rich, and naturally dairy-free coconut ice cream.
    • Ingredients: Coconut milk, sugar, vanilla extract.
    • Instructions: Combine all ingredients, pour into Cuisinart ice cream maker, and churn for 25 minutes.
  • Almond Butter Chocolate Chip Ice Cream
    • Dairy-free with a nutty, creamy base and chocolate chunks.
    • Ingredients: Almond milk, almond butter, sugar, chocolate chips.

Tips for Perfecting Your Cuisinart Ice Cream Recipes

Top Tips for Using Your Cuisinart Ice Cream Maker

  • Pre-Freezing the Bowl
    • Make sure your Cuisinart bowl is pre-frozen for at least 12 hours for optimal results.
  • Adding Mix-Ins
    • Add mix-ins like chocolate chips, nuts, or fruit only in the last 5 minutes of churning for even distribution.

List of Tips:

  • Chill Ingredients: Cold ingredients help the ice cream churn faster.
  • Don’t Overfill: Leave some space for the ice cream to expand as it churns.

Section 7: Frequently Asked Questions About Cuisinart Ice Cream Recipes

H2: FAQs for Making Ice Cream with a Cuisinart Ice Cream Maker

  • How long should I churn ice cream in a Cuisinart ice cream maker?
    • Most recipes take 20-30 minutes, but times vary depending on ingredients.
  • Can I make soft serve in a Cuisinart ice cream maker?
    • Yes! For soft serve, stop churning a few minutes early.
  • How can I make my ice cream smoother?
    • Adding a bit of corn syrup or extra cream can create a smoother texture.

Conclusion

Homemade ice cream is a fun, rewarding experience that allows you to explore new flavors and enjoy fresh, preservative-free treats. With these Cuisinart ice cream recipes, you’ll find a range of flavors to suit any craving. Give your creativity free rein, and enjoy the magic of ice cream-making right at home!