1 cup shredded cheddar cheese (for a rich, cheesy flavor)
2 tablespoons chopped fresh chives (or green onions) for a burst of freshness
Seasoning:
Salt and black pepper, to taste
1 teaspoon garlic powder
1 teaspoon onion powder
Coating:
1 cup breadcrumbs (or crushed crackers for added crunch)
2 tablespoons melted butter for a golden, crispy crust
Garnish:
Fresh parsley for a touch of color (optional)
Instructions:
Preheat Your Oven:
Start by preheating your oven to 375°F (190°C).
Prepare a baking dish by greasing it lightly or lining it with parchment paper for easy cleanup.
Prepare the Chicken:
Lay each chicken breast between two sheets of plastic wrap. Using a meat mallet, gently pound the chicken until it is an even thickness, about ¼ inch.
Season both sides of the chicken with salt, black pepper, garlic powder, and onion powder. This will infuse the chicken with a delightful flavor base.
Make the Cream Cheese Filling:
In a mixing bowl, combine the softened cream cheese, shredded cheddar cheese, and chopped chives. Mix until all the ingredients are well blended and creamy.
Assemble the Roll-Ups:
Lay each chicken breast flat and spread a generous layer of the cream cheese filling on top.
Carefully roll up each chicken breast, tucking in the filling as you go. If needed, use toothpicks to secure the rolls so they don’t come apart during baking.
Coat with Breadcrumbs:
Dip each chicken roll into the melted butter, ensuring it’s evenly coated.
Roll each buttered chicken piece in the breadcrumbs or crushed crackers until fully coated. The buttery coating helps the crumbs stick and adds a crispy texture.
Bake to Perfection:
Place the chicken roll-ups in the prepared baking dish, seam side down.
Bake in the preheated oven for 25-30 minutes or until the chicken is cooked through and the coating is golden brown. The internal temperature should reach 165°F (74°C).
Serve and Enjoy:
Remove from the oven and let the chicken rest for a few minutes.
Garnish with fresh parsley if desired and serve hot. These roll-ups pair beautifully with side dishes like fluffy rice, creamy mashed potatoes, or a fresh green salad.
Tips for Success:
Make-Ahead Option: You can assemble the roll-ups ahead of time and store them in the refrigerator until ready to bake.
Flavor Variations: Feel free to add your favorite herbs or spices to the cream cheese filling, like dill or paprika, for a unique twist.
Enjoy this creamy, cheesy, and savory chicken dish that’s perfect for weeknight dinners or special occasions!
When you think of comfort food, what comes to mind? For many, it’s a dish that evokes fond memories—perhaps a summer picnic or a family gathering where laughter and good food flowed freely. Tuna pasta salad is that dish for me. It’s a delightful blend of flavors and textures that not only satisfies hunger but also warms the heart. Whether you’re meal prepping for a busy week or planning a potluck, this recipe is your go-to solution. Let’s dive into the world of tuna pasta salad and discover how to make it a staple in your kitchen.
What Is Tuna Pasta Salad?
The Basics of Tuna Pasta Salad
Definition and Origin: Explore the history and variations of tuna pasta salad.
Nutritional Benefits: Highlight the health benefits of the main ingredients.
Tuna: High in protein and omega-3 fatty acids.
Pasta: A good source of carbohydrates for energy.
Vegetables: Vitamins and minerals that enhance overall health.
Ingredients for Tuna Pasta Salad
Essential Ingredients
Ingredient
Quantity
Pasta (fusilli or rotini)
2 cups cooked
Canned tuna
1 can (drained)
Mayonnaise
1/2 cup
Celery
1 stalk, diced
Red onion
1/4 cup, diced
Bell pepper
1/2 cup, diced
Sweet pickle relish
1/4 cup
Lemon juice
1 tablespoon
Salt and pepper
To taste
Optional Add-ins
Chickpeas: For extra protein.
Olives: For a salty kick.
Herbs: Fresh parsley or dill for added flavor.
Step-by-Step Instructions to Make Tuna Pasta Salad
Preparation
Cook the Pasta: Boil pasta according to package instructions, drain, and cool.
Prepare the Veggies: Dice celery, onion, and bell pepper.
Mix the Ingredients: In a large bowl, combine pasta, tuna, veggies, and other ingredients.
Dressing It Up
How to Make the Dressing: Blend mayonnaise, lemon juice, salt, and pepper in a separate bowl.
Combine: Pour the dressing over the pasta mixture and stir until well coated.
Serving Suggestions for Tuna Pasta Salad
Creative Serving Ideas
Chilled or Warm: How to serve it at different temperatures.
Side Dish vs. Main Course: Tips on portion sizes and pairings.
Presentation Tips: Ideas for garnishing with herbs or lemon slices.
Storing and Meal Prepping Tuna Pasta Salad
Storage Tips
Refrigeration: Best practices for storing leftovers.
Freezing: Can you freeze tuna pasta salad? Tips and tricks.
Meal Prep Ideas
Portioning: How to prepare single servings for easy grab-and-go meals.
Variations: Suggest alternative recipes for meal prep.
Frequently Asked Questions About Tuna Pasta Salad
FAQs
Can I make tuna pasta salad in advance?
Yes! It can be prepared a day ahead for better flavor.
What can I substitute for mayonnaise?
Greek yogurt or avocado can be great alternatives.
Is tuna pasta salad healthy?
Yes, it’s packed with protein and can be made with whole-grain pasta for added nutrients.
Conclusion: Your New Favorite Recipe Awaits
Tuna pasta salad is more than just a meal; it’s a canvas for your culinary creativity. With its blend of flavors and textures, it’s easy to see why it’s a beloved dish in many households. Whether you’re serving it at a picnic, enjoying it as a quick lunch, or sharing it at a family gathering, this recipe is bound to impress. So grab your ingredients and let your taste buds embark on a delicious journey!
Picture this: it’s a busy evening, and you want to serve something healthy and delicious without spending hours in the kitchen. Enter air fryer salmon. With its perfectly crispy exterior and tender, flaky inside, this dish transforms an ordinary weeknight dinner into a gourmet experience. As you savor the rich flavors and health benefits of salmon, you’ll feel a sense of accomplishment knowing you’ve whipped up a delightful meal in no time. This article will guide you through everything you need to know about preparing air fryer salmon, making it a staple in your cooking repertoire.
Why Choose Air Fryer Salmon?
Health Benefits of Salmon
Omega-3 Fatty Acids: Promote heart health and reduce inflammation.
High Protein: Supports muscle health and keeps you feeling full.
Vitamins and Minerals: Packed with B vitamins, potassium, and selenium.
Advantages of Using an Air Fryer
Speed: Cooks food faster than traditional methods.
Healthier Cooking: Uses less oil while still achieving a crispy texture.
Convenience: Easy cleanup and minimal monitoring required.
Ingredients for Air Fryer Salmon
Ingredient
Quantity
Salmon fillets
2 (6 oz each)
Olive oil
1 tbsp
Garlic powder
1 tsp
Paprika
1 tsp
Lemon juice
1 tbsp
Salt and pepper
To taste
Fresh herbs (optional)
Dill or parsley
Step-by-Step Guide to Making Air Fryer Salmon
Preparing the Salmon
Choose Quality Salmon: Opt for fresh or frozen salmon fillets.
Pat Dry: Use paper towels to remove excess moisture for better crisping.
Seasoning the Fillets
In a small bowl, mix olive oil, garlic powder, paprika, lemon juice, salt, and pepper.
Brush the mixture evenly over the salmon fillets.
Cooking in the Air Fryer
Preheat the Air Fryer: Set it to 400°F (200°C) for 5 minutes.
Arrange the Fillets: Place salmon skin-side down in the air fryer basket.
Cooking Time: Air fry for 8-10 minutes, depending on thickness.
Checking for Doneness
Use a fork to check if the salmon flakes easily.
Aim for an internal temperature of 145°F (63°C).
Tips for Perfect Air Fryer Salmon
Don’t Overcrowd the Basket: Cook in batches if necessary for even cooking.
Experiment with Flavors: Try different marinades or spices to suit your taste.
Use a Meat Thermometer: Ensures accurate cooking and prevents overcooking.
Serving Suggestions for Air Fryer Salmon
Serve with a side of steamed vegetables or a fresh salad.
Pair with quinoa or brown rice for a wholesome meal.
Drizzle with extra lemon juice or a yogurt-based sauce for added flavor.
FAQ About Air Fryer Salmon
Can I use frozen salmon in the air fryer?
Yes, just increase the cooking time by a few minutes.
How do I know when the salmon is done?
The salmon should flake easily with a fork and reach an internal temperature of 145°F (63°C).
What other seasonings can I use?
Feel free to experiment with herbs like dill, thyme, or even a spicy rub for added zest.
Conclusion
Cooking air fryer salmon is a game changer for busy weeknights or when you simply want to enjoy a healthy meal without the fuss. With its quick prep time and delightful flavors, it’s no wonder this dish has become a favorite among home cooks. So, why not give it a try tonight? Gather your ingredients, follow the steps, and treat yourself to a restaurant-quality dish in the comfort of your own home. Don’t forget to share your experience and let us know how your air fryer salmon turned out! Happy cooking!
If you’ve ever savored the tangy, sweet, and smoky goodness of Chick-fil-A sauce, you know it’s more than just a condiment—it’s an experience. That perfect balance of flavors can turn an ordinary meal into something extraordinary. Whether you’re dipping crispy chicken nuggets or drizzling it over a salad, this sauce brings a taste of the beloved fast-food chain right into your kitchen. Today, you’ll learn how to make this iconic sauce at home, so you can enjoy it anytime you want.
What Makes Chick-fil-A Sauce So Special?
The Flavor Profile
Chick-fil-A sauce is known for its unique combination of flavors that include:
Tangy: A hint of vinegar for that zesty kick
Sweet: A touch of honey or sugar for balance
Smoky: A hint of barbecue sauce for depth
Creamy: The smooth texture that makes it perfect for dipping
Chick-fil-A Sauce Recipe
Ingredients Table
Ingredient
Amount
Mayonnaise
½ cup
Honey
2 tablespoons
Yellow mustard
1 tablespoon
Barbecue sauce
1 tablespoon
Garlic powder
½ teaspoon
Salt
To taste
Instructions
Mix the Base: In a medium bowl, combine the mayonnaise, honey, and yellow mustard. Stir until well blended.
Add Flavor: Incorporate the barbecue sauce, garlic powder, and salt. Mix until smooth.
Taste and Adjust: Sample the sauce and adjust the sweetness or tanginess by adding more honey or mustard as needed.
Chill and Serve: For best results, let the sauce sit in the refrigerator for at least an hour to allow the flavors to meld. Serve with your favorite dishes!
Tips for the Perfect Chick-fil-A Sauce
Customize Your Sauce
Add Spices: Consider a dash of cayenne pepper for heat or a sprinkle of smoked paprika for extra smokiness.
Use Different Mustards: Experiment with Dijon mustard for a sharper flavor.
Storage and Shelf Life
Storing: Keep your homemade sauce in an airtight container in the fridge.
Shelf Life: It should stay fresh for about a week.
Frequently Asked Questions (FAQs)
How can I make this sauce healthier?
You can use Greek yogurt in place of mayonnaise for a lighter option, while still keeping that creamy texture.
Can I freeze Chick-fil-A sauce?
While it’s not recommended to freeze mayonnaise-based sauces, you can store it in the fridge and enjoy it within a week.
What can I use this sauce for besides chicken?
This versatile sauce is great as a dressing for salads, a dip for veggies, or even spread on sandwiches!
Conclusion: Elevate Your Meals
Now that you have your very own Chick-fil-A sauce recipe, you can add that signature taste to any meal. This homemade version not only saves you a trip to the drive-thru but also allows you to adjust flavors to your liking. Whether you’re hosting a gathering, enjoying a family dinner, or simply treating yourself, this sauce will surely be a hit.
Call to Action
If you tried this recipe, share your thoughts in the comments below! How did you customize your Chick-fil-A sauce? Don’t forget to share this recipe with friends and family who are just as passionate about this delicious condiment as you are!
Beef back ribs are a true delight for any meat lover. With their rich flavor and succulent tenderness, they make for a perfect centerpiece at gatherings, barbecues, or family dinners. If you’re looking to elevate your cooking game, this beef back ribs recipe will guide you step-by-step to create mouthwatering ribs that will have everyone asking for seconds. Let’s dive into the delicious world of beef back ribs!
Why Choose Beef Back Ribs?
Beef back ribs come from the upper part of the cow’s rib cage, offering a meatier and more flavorful experience than many other cuts. Here are a few reasons why you should choose beef back ribs for your next meal:
Rich Flavor: These ribs have a bold, beefy taste that pairs beautifully with various seasonings and sauces.
Cooking Versatility: Whether you prefer grilling, smoking, or baking, beef back ribs adapt well to multiple cooking methods.
Perfect for Sharing: Their generous size makes them an excellent choice for gatherings, ensuring there’s plenty to go around.
Essential Ingredients for Your Beef Back Ribs Recipe
Before you begin, gather these essential ingredients:
Ingredient
Quantity
Beef back ribs
3-4 pounds
Olive oil
2 tablespoons
Salt
1 tablespoon
Black pepper
1 tablespoon
Garlic powder
1 tablespoon
Onion powder
1 tablespoon
Paprika
2 teaspoons
BBQ sauce (optional)
1 cup
Optional Flavor Enhancements
Feel free to customize your ribs with these optional ingredients:
Marinades: Soy sauce or apple cider vinegar can add depth of flavor.
Spices: For a kick, consider cayenne pepper or chili powder.
Herbs: Fresh thyme or rosemary can enhance the aroma.
Step-by-Step Guide to Cooking Beef Back Ribs
Preparing the Ribs
Remove the Membrane: Flip the ribs bone-side up and peel off the thin membrane using a paper towel for grip. This helps the seasoning penetrate better.
Season Generously: Rub olive oil over the ribs, then sprinkle salt, black pepper, garlic powder, onion powder, and paprika all over, ensuring even coverage.
Cooking Methods
Grilling
Preheat the Grill: Set your grill to medium heat.
Indirect Cooking: Place the ribs on the cooler side of the grill, away from direct flames.
Cook Slowly: Grill the ribs for 3-4 hours, basting with BBQ sauce in the last 30 minutes for added flavor.
Smoking
Choose Your Wood: Hickory or applewood works well for a rich, smoky taste.
Temperature Control: Maintain a steady temperature of 225°F (107°C).
Long Cook Time: Smoke the ribs for 5-6 hours, spritzing with apple juice every hour to keep them moist.
Baking
Preheat the Oven: Set your oven to 300°F (150°C).
Wrap for Moisture: Place the ribs in a foil pouch to lock in moisture.
Baking Duration: Bake for 2.5 to 3 hours, removing the foil for the last 30 minutes to caramelize the exterior.
Tips for Perfect Beef Back Ribs
Avoiding Common Mistakes
Don’t Rush the Process: Low and slow is the key. Rushing will result in tougher meat.
Use a Meat Thermometer: Aim for an internal temperature of 190°F (88°C) for optimal tenderness.
Let Them Rest: Allow the ribs to rest for at least 15 minutes after cooking to help the juices redistribute.
Flavor Pairings
Side Dishes: Serve with coleslaw, cornbread, or baked beans to complement the meal.
Sauce Options: Experiment with different BBQ sauces or homemade glazes for variety.
Frequently Asked Questions (FAQ)
What is the best way to cook beef back ribs?
The best method depends on your preference. Grilling gives a great char, while smoking adds deep flavor. Baking is convenient for a tender finish.
How long should I cook beef back ribs?
For grilling, cook for 3-4 hours; for smoking, aim for 5-6 hours; and if baking, allow 2.5 to 3 hours.
Can I use other cuts of beef for this recipe?
While this recipe is tailored for beef back ribs, you can try it with short ribs, but adjust the cooking time as needed.
Conclusion: Make Memories with Delicious Beef Back Ribs
With this ultimate beef back ribs recipe, you’re set to impress your family and friends with incredibly tender and flavorful ribs. The process may take time, but the results are well worth the effort. Gather your ingredients, follow the steps, and enjoy the delicious rewards of your culinary adventure.
Call To Action
Click here to change this text. Lorem ipsum dolor sit amet, consectetur adipiscing elit. Ut elit tellus, luctus nec ullamcorper mattis, pulvinar dapibus leo.
Grilled Lemon Herb Chicken: A Fresh and Flavorful Delight
Opening Reflection:
Emotional Connection:
Begin with a personal anecdote about family gatherings or summer barbecues where grilled lemon herb chicken was a centerpiece. Highlight how the aroma of lemon and herbs evokes memories of warmth and togetherness, creating a sense of nostalgia and joy.
Emphasize the simplicity and elegance of the dish, making it accessible for everyone, from novice cooks to seasoned chefs.
Why Grilled Lemon Herb Chicken is Your Go-To Recipe
Health Benefits of Chicken
Key Points:
Low in fat and high in protein, making it a healthy choice for lunches or dinners.
Contains essential nutrients, including B vitamins and minerals.
Source: Reference nutritional data from credible health websites.
The Flavorful Combination of Lemon and Herbs
Key Points:
Discuss how lemon adds brightness and acidity, enhancing the chicken’s flavor.
Mention popular herbs (e.g., rosemary, thyme, parsley) and their unique benefits.
Source: Cite culinary experts or articles discussing flavor pairings.
Ingredients for Grilled Lemon Herb Chicken
Ingredients
Quantity
Chicken breasts
4 pieces
Olive oil
1/4 cup
Fresh lemon juice
2 lemons
Garlic cloves (minced)
3 cloves
Fresh herbs (rosemary, thyme, parsley)
1/4 cup mixed
Salt and pepper
To taste
How to Prepare Grilled Lemon Herb Chicken
Step-by-Step Marination Process
Key Points:
Combine olive oil, lemon juice, minced garlic, and herbs in a bowl.
Add salt and pepper, then whisk until blended.
Marinate chicken for at least 30 minutes (or overnight for enhanced flavor).
Grilling Instructions
Key Points:
Preheat grill to medium-high heat.
Grill chicken for 6-7 minutes on each side, or until internal temperature reaches 165°F.
Let it rest for 5 minutes before slicing to retain juiciness.
Serving Suggestions for Grilled Lemon Herb Chicken
Complementary Side Dishes
Key Points:
Suggest serving with roasted vegetables, quinoa, or a fresh garden salad.
Recommend pairing with a light white wine or lemonade.
Creative Ways to Enjoy Leftovers
Key Points:
Use in salads, wraps, or as a topping for pasta.
Share ideas for meal prep and easy lunches.
Frequently Asked Questions (FAQ)
What is the best way to marinate chicken for grilling?
Key Points:
Discuss optimal marinating time and techniques for maximum flavor.
Can I use different herbs for this recipe?
Key Points:
Yes, you can customize the herbs based on personal preference or availability.
How do I know when the chicken is done?
Key Points:
Mention using a meat thermometer and checking for a clear juice.
Conclusion
Recap Key Points: Summarize the ease and deliciousness of grilled lemon herb chicken.
Emotional Appeal: Reinforce how this dish can bring friends and family together, creating memorable meals.
Call to Action: Encourage readers to try this recipe at their next gathering and share their experiences or variations in the comments.
Grilled Lemon Herb Chicken: A Fresh and Flavorful Delight
When you think of summer, what comes to mind? The smell of fresh herbs wafting through the air, laughter echoing around the grill, and that perfect piece of chicken sizzling away. Grilled lemon herb chicken has a unique way of evoking those warm, joyous memories, making it a favorite at family barbecues and casual gatherings. With its vibrant flavors and aromatic herbs, this dish doesn’t just satisfy your taste buds; it brings people together. Whether you’re a seasoned cook or just starting, this recipe is your gateway to creating delightful moments in the kitchen and around the table.
Why Grilled Lemon Herb Chicken is Your Go-To Recipe
Health Benefits of Chicken
Chicken is a fantastic choice for those looking to maintain a healthy lifestyle. It is low in fat yet high in protein, making it ideal for lunches or dinners. Packed with essential nutrients, such as B vitamins and minerals, chicken serves as a great foundation for any meal.
The Flavorful Combination of Lemon and Herbs
The magic of grilled lemon herb chicken lies in its bright flavors. The zesty kick of lemon juice balances beautifully with fresh herbs like rosemary, thyme, and parsley, each contributing its unique essence. This combination not only elevates the chicken’s taste but also brings a burst of freshness to your plate.
Ingredients for Grilled Lemon Herb Chicken
Ingredients
Quantity
Chicken breasts
4 pieces
Olive oil
1/4 cup
Fresh lemon juice
2 lemons
Garlic cloves (minced)
3 cloves
Fresh herbs (rosemary, thyme, parsley)
1/4 cup mixed
Salt and pepper
To taste
How to Prepare Grilled Lemon Herb Chicken
Step-by-Step Marination Process
To unlock the full potential of your grilled lemon herb chicken, the marination process is key. Start by combining the olive oil, freshly squeezed lemon juice, minced garlic, and your choice of herbs in a mixing bowl. Add salt and pepper, whisking until well blended. Let your chicken marinate in this flavorful mix for at least 30 minutes—overnight if you have the time. This allows the flavors to penetrate deeply into the meat, ensuring each bite is bursting with taste.
Grilling Instructions
Once your chicken has marinated, it’s time to grill. Preheat your grill to medium-high heat, allowing it to reach the perfect temperature. Place the chicken on the grill and cook for about 6-7 minutes on each side, or until the internal temperature reads 165°F on a meat thermometer. After grilling, let the chicken rest for about five minutes. This crucial step helps retain its juiciness, ensuring that every bite is tender and flavorful.
Serving Suggestions for Grilled Lemon Herb Chicken
Complementary Side Dishes
Pair your grilled lemon herb chicken with roasted vegetables, a refreshing quinoa salad, or a light garden salad to enhance the meal. A chilled glass of white wine or homemade lemonade can further complement the dish’s flavors, making your lunch feel like a special occasion.
Creative Ways to Enjoy Leftovers
Don’t let any leftovers go to waste! Shred your grilled chicken and toss it into salads or wraps for a quick lunch. Alternatively, serve it as a topping for pasta with a light sauce. Meal prepping with this versatile chicken can simplify your week while keeping your meals exciting.
Frequently Asked Questions (FAQ)
What is the best way to marinate chicken for grilling?
For the best flavor, marinate chicken for at least 30 minutes, but overnight is ideal. Ensure the chicken is evenly coated in the marinade for maximum absorption.
Can I use different herbs for this recipe?
Absolutely! Feel free to experiment with herbs that you enjoy or have on hand. Basil, oregano, or even cilantro can offer delightful variations.
How do I know when the chicken is done?
The best way to check doneness is to use a meat thermometer, ensuring it reads 165°F. Additionally, clear juices running from the chicken indicate it’s cooked properly.
Conclusion
Grilled lemon herb chicken is not just a meal; it’s an experience that invites you to create memories with loved ones. With its bright flavors and simple preparation, this dish is sure to become a staple in your culinary repertoire. So, why not bring this recipe to your next gathering? Try it out and share your experiences in the comments below. Your journey to deliciousness starts here!
Halloween is a time for spooky fun, and what better way to celebrate than with a festive treat? Mummy Hot Dogs are an easy, delicious, and crowd-pleasing snack that will be the highlight of your Halloween gathering. Whether you’re hosting a family party, inviting friends over, or looking for a fun activity to do with your kids, these cute and creepy Mummy Hot Dogs are a must.
What Are Mummy Hot Dogs?
Mummy Hot Dogs are a playful twist on classic pigs in a blanket, where hot dogs are wrapped in crescent roll dough to resemble spooky little mummies. After baking, you can add mustard or ketchup “eyes” to complete the look. They’re a fun, simple way to bring Halloween spirit to your snack table, and kids especially love them.
Ingredients You’ll Need
To make your own Mummy Hot Dogs, you only need a few basic ingredients:
1 package of hot dogs
1 can of refrigerated crescent roll dough
Mustard or ketchup for eyes
Optional: cheese slices for extra flavor
Step-by-Step Guide to Making Mummy Hot Dogs
Step 1: Preheat Your Oven
Begin by preheating your oven to 375°F (190°C). This will ensure the dough bakes evenly, resulting in golden, crispy mummies.
Step 2: Prepare the Crescent Dough
Unroll the crescent dough and cut it into thin strips. You’ll use these strips to wrap around the hot dogs to create the mummy effect.
Step 3: Wrap the Hot Dogs
Take each hot dog and wrap the dough strips around it, leaving small gaps for the “mummy” to peek through. You can wrap them in different patterns for extra creativity. If you’re adding cheese, place a small slice of cheese on the hot dog before wrapping the dough.
Step 4: Bake to Perfection
Place the wrapped hot dogs on a baking sheet lined with parchment paper. Bake for 12-15 minutes or until the dough turns golden brown and crispy.
Step 5: Add the Mummy Eyes
Once baked, remove the hot dogs from the oven and let them cool for a few minutes. Use a toothpick to dab small dots of mustard or ketchup to create eyes on the mummies.
Fun Variations to Try
Want to spice up your Mummy Hot Dogs recipe? Try some of these fun variations:
Mini Mummies: Use mini hot dogs or cocktail sausages for bite-sized mummies.
Cheesy Mummies: Add a slice of cheese under the dough for a gooey surprise inside.
Vegetarian Mummies: Substitute veggie hot dogs for a meat-free version.
Spicy Mummies: Add jalapeño slices for a little heat.
Serving Suggestions
Mummy Hot Dogs are the perfect party snack, but how can you make them even better? Serve them with a variety of dipping sauces like ketchup, mustard, or spicy mayo to cater to different tastes. Pair them with other Halloween-themed treats like spooky spider cupcakes or witch finger cookies for a full Halloween spread. These mummies also go great with a side of sweet potato fries or a fresh green salad for a balanced meal.
Tips for Making the Best Mummy Hot Dogs
Keep it simple: If you’re in a rush, you can prep the dough and hot dogs ahead of time and pop them in the oven when guests arrive.
Get creative: Let your kids help with the wrapping process; they’ll have a blast creating their own mummy designs!
Use puff pastry: If you don’t have crescent roll dough, puff pastry works just as well and adds a flakier texture.
FAQ Section
Can I make Mummy Hot Dogs ahead of time? Yes! You can prepare them in advance and store them in the fridge for a few hours before baking. Just pop them in the oven when you’re ready to serve.
What other types of dough can I use for Mummy Hot Dogs? If you don’t have crescent roll dough, puff pastry or even pizza dough will work. Both give a delicious texture to the mummies.
Are Mummy Hot Dogs suitable for kids? Absolutely! Kids love helping make these, and they’re fun to eat. Plus, they’re easy for little hands to hold.
Conclusion
Mummy Hot Dogs are the perfect combination of fun, flavor, and festivity. Whether you’re making them as a quick snack or a party favorite, they’re sure to delight your guests with their spooky appearance and savory taste. Get creative, add your personal twist, and enjoy a simple recipe that brings a little magic to your Halloween celebration.
A smoothie bowl is similar to a regular smoothie, but thicker in consistency and often topped with various ingredients like fruits, nuts, seeds, and granola. Unlike traditional smoothies, smoothie bowls are meant to be eaten with a spoon, giving you a more substantial and filling breakfast. They’re also customizable, making it easy to adapt them to your dietary preferences or nutritional needs.
The Health Benefits of Smoothie Bowls
Smoothie bowls are not only delicious but also packed with nutrients. Here’s why they’re a great addition to your diet:
High in Fiber: Smoothie bowls often include fruits, oats, and seeds, all of which provide ample dietary fiber. Fiber aids digestion and helps you stay full longer.
Rich in Antioxidants: Ingredients like berries, spinach, and chia seeds are loaded with antioxidants, which help fight inflammation and protect against cell damage.
Vitamins and Minerals: You can pack a smoothie bowl with leafy greens, nuts, and other superfoods, ensuring you get a wide range of essential vitamins and minerals in each serving.
Energy-Boosting: Smoothie bowls, especially those with added protein or healthy fats, provide sustained energy throughout your morning.
How to Make the Perfect Smoothie Bowl
Step-by-Step Guide to Crafting a Smoothie Bowl
Choose Your Base: Start with a creamy base like frozen bananas, mangoes, or berries. These not only create the desired texture but also add natural sweetness.
Pick Your Liquid: For the perfect consistency, use just enough liquid to blend your ingredients without making it too runny. Good options include almond milk, coconut water, or plain water.
Add a Protein or Superfood Boost: Want to make your smoothie bowl more filling? Add in protein powder, nut butter, or superfoods like spirulina or chia seeds.
Blend Until Smooth: Blend your base ingredients and liquid until smooth, but keep it thick. You want the mixture to hold your toppings without sinking.
Top It Off: The fun part! Add toppings like sliced fruits, granola, seeds, coconut flakes, or even a drizzle of honey or almond butter for extra flavor and crunch.
Example Smoothie Bowl Ingredients Table:
Ingredient
Amount
Benefits
Frozen Bananas
1 cup
Adds creaminess and natural sweetness
Mixed Berries
1/2 cup
Rich in antioxidants and vitamins
Almond Milk
1/2 cup
Dairy-free, light, and nutty flavor
Chia Seeds
1 tbsp
High in fiber and omega-3 fatty acids
Granola
1/4 cup
Adds crunch and extra fiber
Fresh Berries
1/4 cup
Boosts flavor and provides more vitamins
Topping Ideas for Your Smoothie Bowl
Your toppings can take your smoothie bowl from good to great! Here are some popular and creative ideas:
Crunchy Toppings: Granola, crushed nuts, seeds (like chia or flax), and toasted coconut flakes.
Fruity Additions: Fresh berries, sliced bananas, kiwi, or pomegranate seeds.
Sweet Boosts: A drizzle of honey, maple syrup, or almond butter.
Creative Touches: Edible flowers, cacao nibs, or a sprinkle of matcha powder for a pop of color and extra health benefits.
Pro Tip: To create an Instagram-worthy bowl, arrange your toppings neatly in rows or fun patterns.
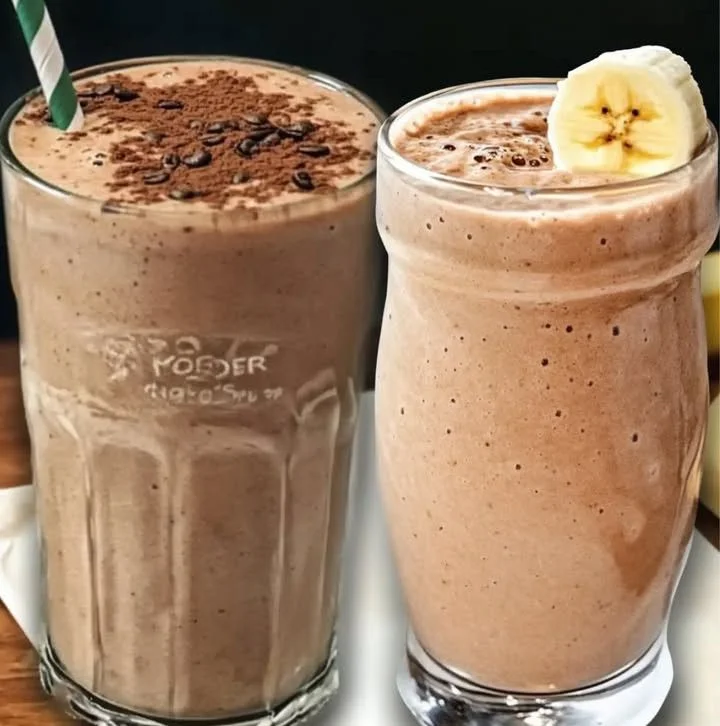
Toppings: Dark chocolate shavings, crushed peanuts, chia seeds
Smoothie Bowls for Special Diets
Smoothie bowls are incredibly versatile and can be tailored to fit any dietary preference:
Vegan: Use plant-based milk like almond, soy, or coconut milk. Replace yogurt with dairy-free alternatives.
Keto: Focus on low-carb ingredients like avocado, spinach, and protein powder. Skip high-carb fruits like bananas or mangoes.
Gluten-Free: Most smoothie bowls are naturally gluten-free, but double-check toppings like granola to ensure they are certified gluten-free.
FAQs About Smoothie Bowls
1. What makes smoothie bowls different from regular smoothies?
Smoothie bowls are thicker, eaten with a spoon, and usually topped with a variety of ingredients that add texture and flavor. The thicker consistency allows you to enjoy the toppings in every bite.
2. Are smoothie bowls healthy?
Yes! Smoothie bowls can be packed with fruits, vegetables, and other nutrient-dense ingredients. However, be mindful of portion sizes and added sugars in some toppings like honey or sweetened granola.
3. Can I make a smoothie bowl the night before?
Absolutely! Prepare the base and store it in the fridge. In the morning, add your toppings fresh for the best texture and flavor.
4. What’s the best way to get a thick consistency for my smoothie bowl?
Using frozen fruits, especially bananas or berries, helps create a thick texture. Limit the amount of liquid you use to keep the mixture from becoming too runny.
Conclusion: Start Your Day with a Smoothie Bowl
Smoothie bowls are more than just a food trend—they’re a nutritious, customizable, and delicious way to power up your mornings. Whether you’re looking for a quick and healthy breakfast or want to experiment with new ingredients, there’s no limit to the combinations you can create. Give one of these recipes a try and see how a smoothie bowl can transform your mornings!
Rinse the shrimp under cold water and pat dry with paper towels. Season lightly with salt and pepper.
Heat the Butter:
In a large skillet, melt the butter over medium heat.
Sauté the Garlic:
Add the minced garlic to the skillet and sauté for about 1-2 minutes until fragrant, being careful not to burn it.
Cook the Shrimp:
Add the shrimp to the skillet in a single layer. Cook for about 2-3 minutes on one side until pink, then flip them over.
Add Seasoning:
Sprinkle the red pepper flakes over the shrimp, then add the lemon juice. Cook for an additional 1-2 minutes, until the shrimp are cooked through and opaque.
Garnish:
Remove from heat, sprinkle with fresh parsley, and adjust seasoning with salt and pepper to taste.
Serve:
Serve immediately with lemon wedges on the side. This dish pairs wonderfully with rice, pasta, or crusty bread.
Tips:
For extra flavor, you can add a splash of white wine after cooking the garlic, allowing it to reduce before adding the shrimp.
Customize the dish by adding vegetables like spinach or cherry tomatoes.
Enjoy your delicious garlic butter shrimp! It’s sure to be a hit with everyone!